Опис
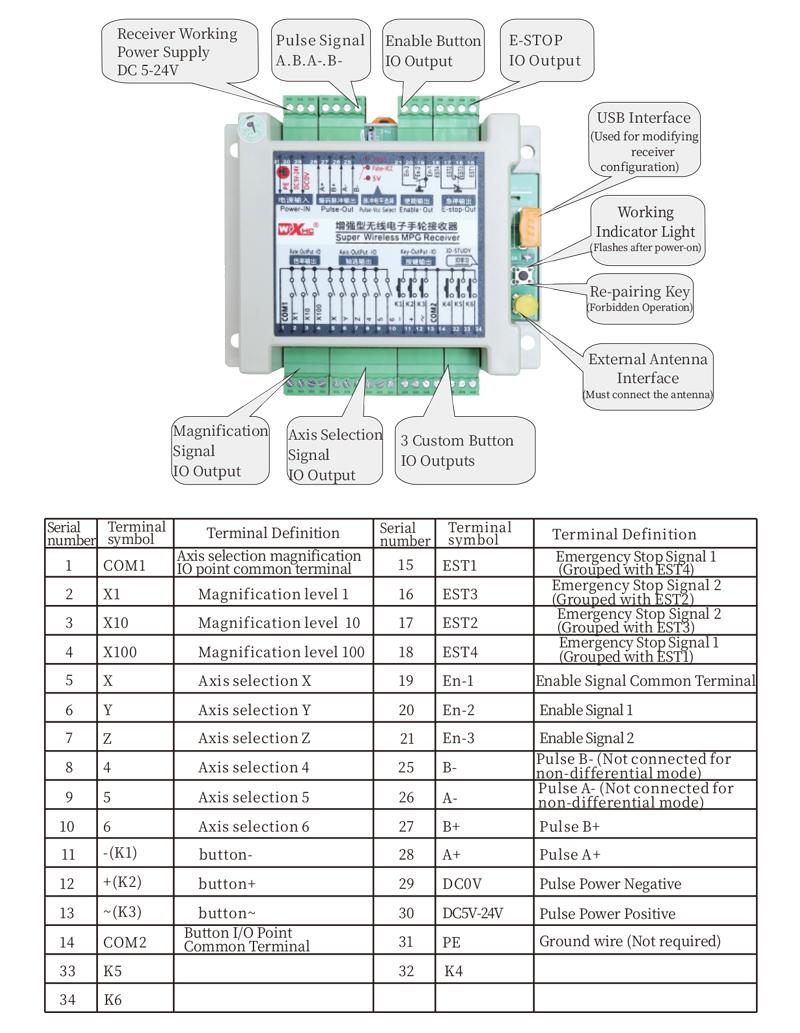
1.Вовед во производ
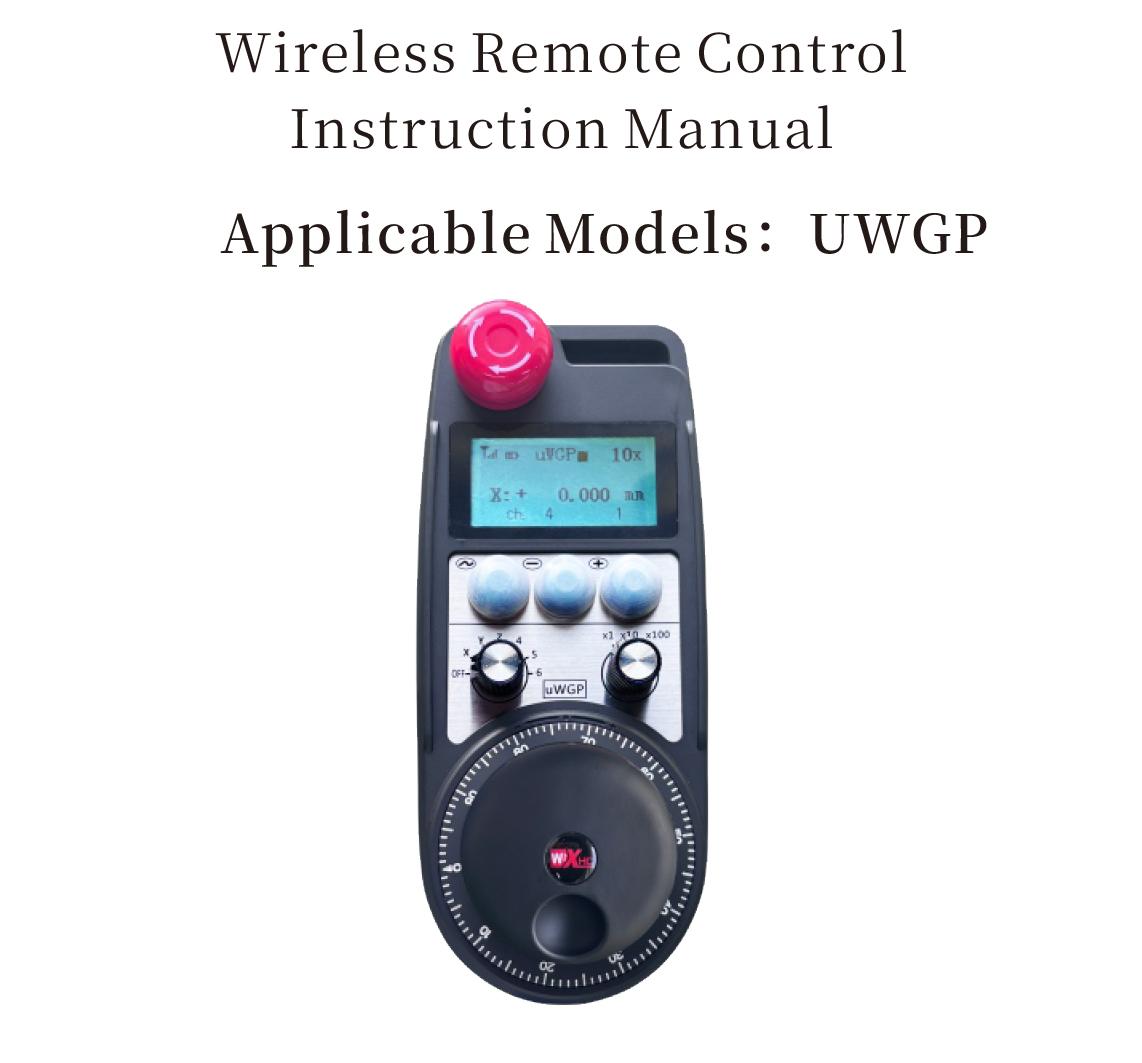
Wireless Remote Control is used for manual guidance, позиционирање, tool setting and other operations of CNC machine tools. Овој производ ја прифаќа технологијата за безжичен пренос, елиминирање на традиционалното поврзување со пружинска жица, намалување на дефектите на опремата предизвикани од кабли, елиминирање на недостатоците на влечењето на кабелот, дамки од масло, итн., and is more convenient to operate.It is widely applicable to CNC machine tools such as gantry machining centers, gantry vertical lathes, and CNC gear processing machines, and is compatible with various mainstream CNC system brands on the market, including Siemens, Мицубиши, Фануч, Syntec and more.
2.Карактеристики на производот
1. Усвојува безжична комуникациска технологија од 433 MHz со безжично работно растојание од 20 метри.
2.Приспособливо скокање со фреквенција; 32 сетови безжични далечински управувачи може да се користат истовремено без пречки.
3.Supports the emergency stop button, and the emergency stop button remains effective even after the remote control is powered off.
4.Поддржува 3 прилагодени копчиња со прекинувачки излез на IO сигнал.
5.Поддржува контрола со 6 оски, и 7 Контролата со 12 оски е приспособлива.
6. Поддржува 3-брзинска контрола на зголемување, и 4-брзинската контрола на зголемување е приспособлива.
7.ја поддржува функцијата на копчето за овозможување, кои можат да излезат преклопни IO сигнали, а исто така го контролира изборот на оската, зголемување и енкодер.
8.Поддржува менување на типот на кодирање на избор на оска и зголемување преку софтвер.
9. Supports pulse encoder with specification of 100 пулсирања по револуција.
10. Supports standard Type-C charging with 5V-2A charging specification; built-in battery
specification: 14500 / 1100mAh.
3. Спецификации на производот
| Working Voltage and Current of Handheld Terminal |
3.7V/20.0mA |
| Charging Battery Specification |
3.7V/14500/1100mAh
|
| Low Voltage Alarm Range of Handheld Terminal |
<3.35V |
| Receiver Power Supply Voltage |
DC5V-24V/1A |
| Receiver Emergency Stop Output Load Range |
AC125V-1A/DC30V-2A |
| Receiver Enable Output Load Range |
AC125V-1A/DC30V-2A |
| Receiver Custom Button Output Load Range |
DC24V/50mA
|
| Receiver Axis Selection Output Load Range |
DC24V/50mA |
| Receiver magnification Output Load Range |
DC24V/50mA |
| Handheld Terminal Transmit Power |
15dBm
|
| Чувствителност на приемот на ресиверот |
-100dBm |
| Фреквенција на безжична комуникација |
433Фреквентен опсег MHz
|
| Wireless Communication Distance |
20 meters barrier-free distance
|
| Operating Temperature |
-25℃<X<55℃ |
| Safe drop height |
1 м
|
| Number of Custom Buttons |
3
|
| Product Weight |
546.86(g) |
| Product Dimensions |
200*87*72(мм) |
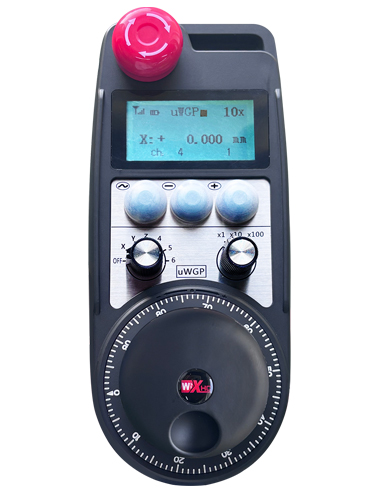
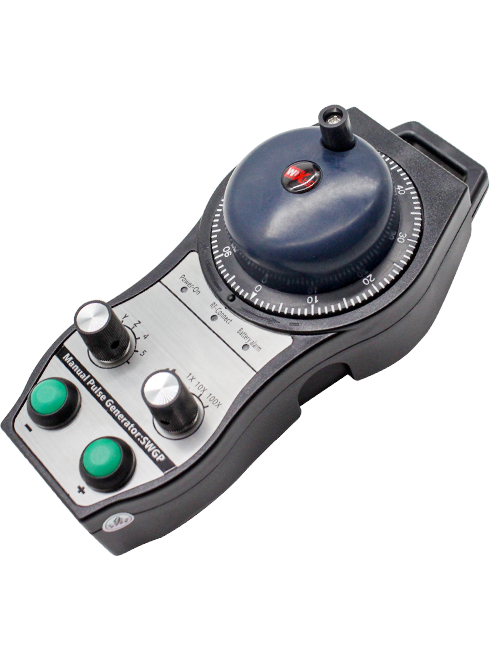
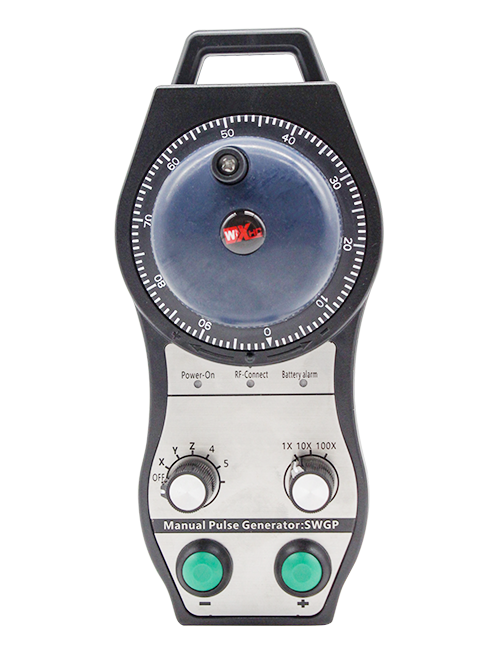
4. Функција на производот Вовед
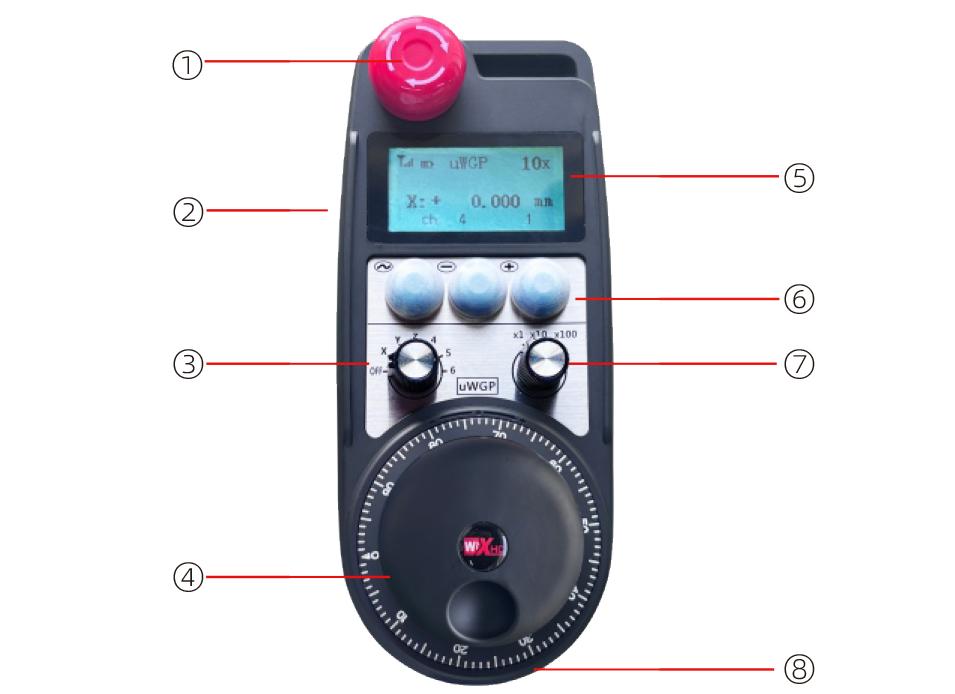
Белешки:
① Emergency Stop Button:
Притиснете го копчето за итно стопирање, the two groups of emergency stop IO outputs on the receiver will disconnect, and all remote control functions will be invalidated.Release the emergency stop button, the emergency stop IO outputs on the receiver will be closed, and all remote control functions will be restored. Покрај тоа, even if the remote control is powered off, pressing the emergency stop button can still activate the emergency stop IO output of the receiver.
② Enable Button:
Press either enable button on both sides, the two sets of enable IO outputs on the receiver will conduct. Release the enable button, and the enable IO outputs will disconnect. It is necessary to press and hold the enable button before toggling axis selection, magnification or rotating the remote control for the operation to take effect.This function can be canceled through the configuration software.
③ Axis Selection Switch (Power Switch):
Притиснете и задржете го копчето за овозможување, then toggling the axis selection switch can control the movement of axis .Press and hold the enable button, then toggle the axis selection switch to switch the motion axis controlled by the remote control. Toggle the switch from the OFF position to any axis position, and the remote control will power on automatically.
④ Pulse Encoder:
Press and hold the enable button and rotate the pulse encoder, it will output pulse signals to control the movement of the machine axis.
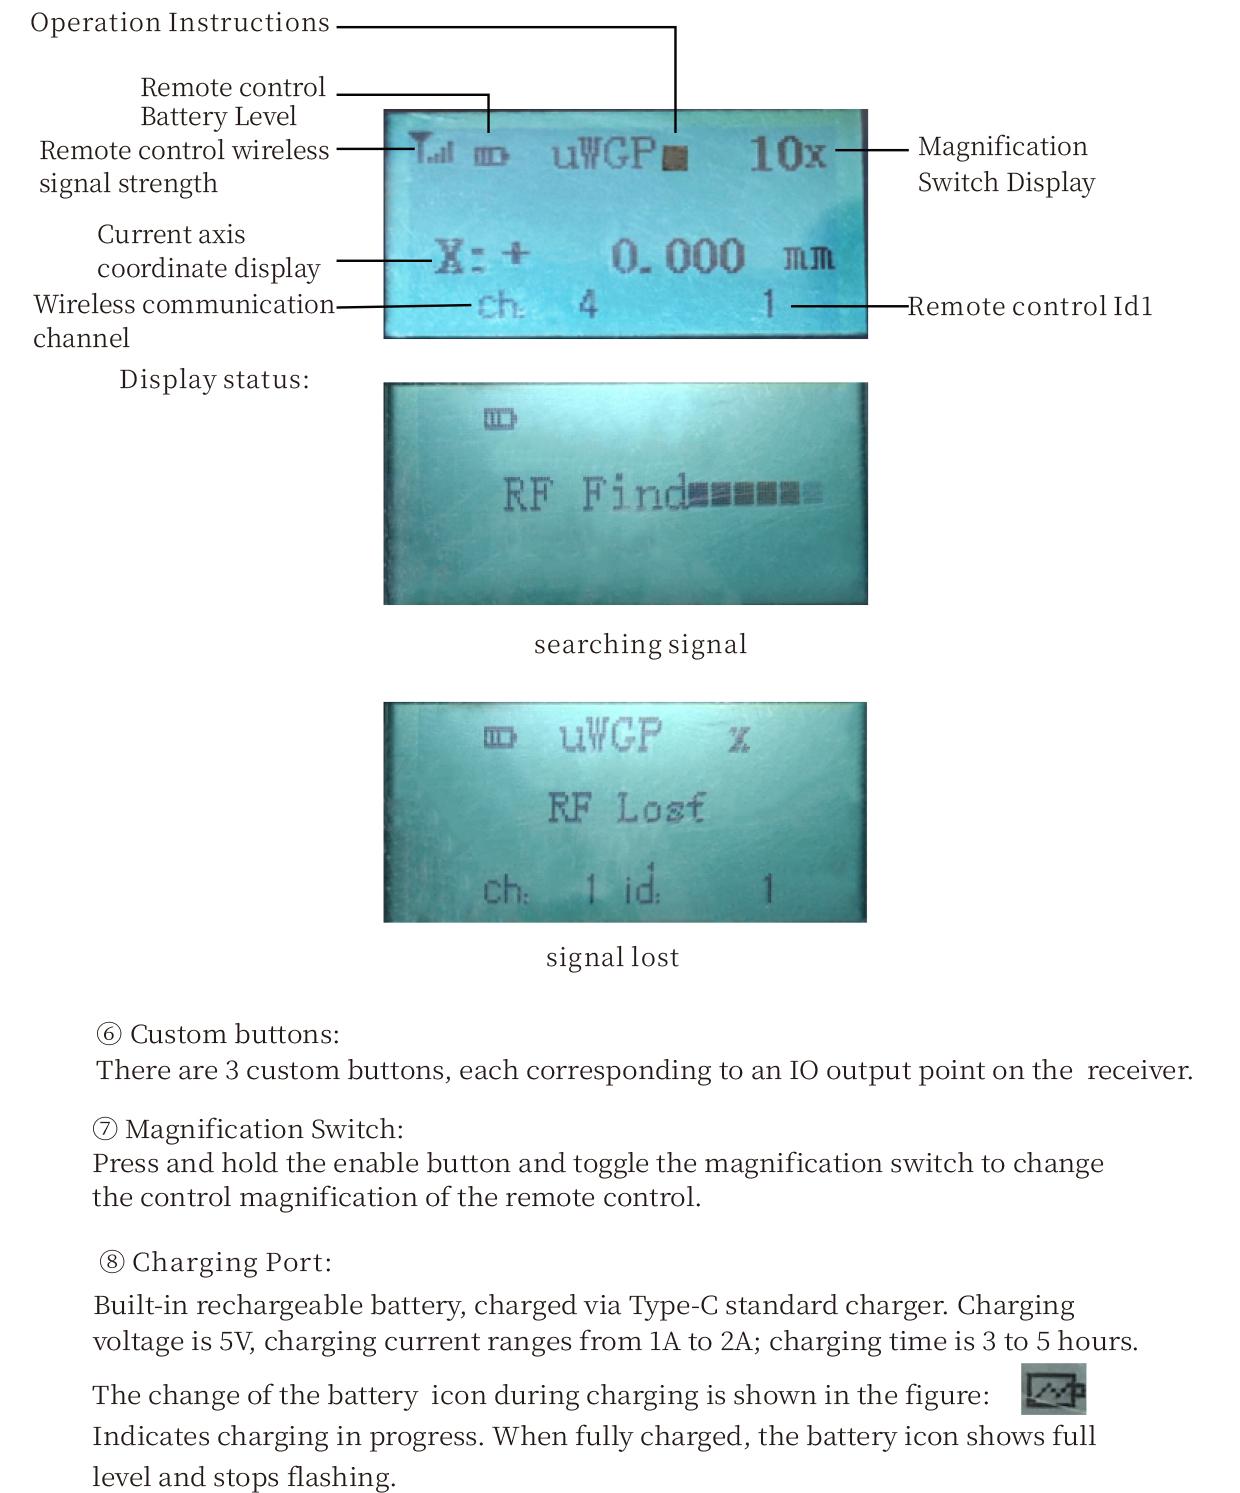
⑤ LCD Display Screen:
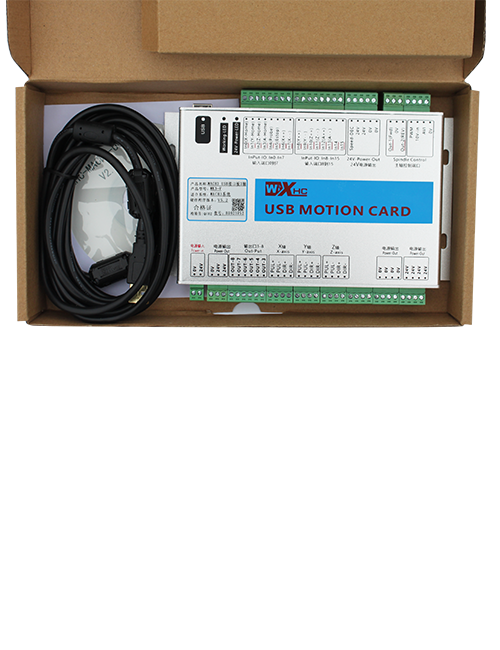
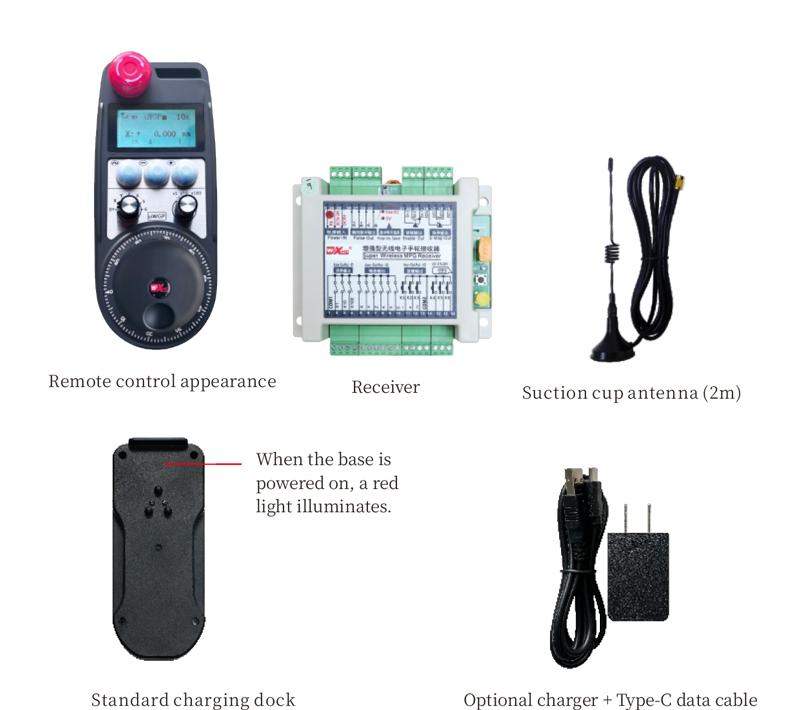
5. Product Accessories Diagram
6. Водич за инсталација на производот
6.1 Чекори за инсталација на производот
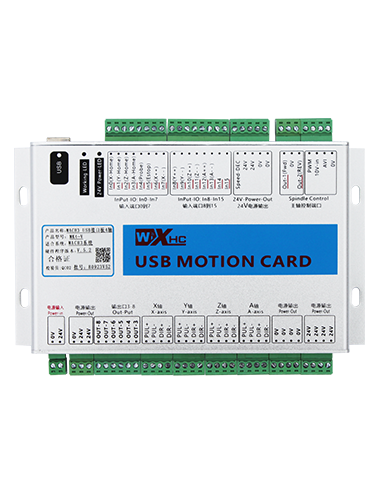
1. Install the receiver in the electrical cabinet via the buckle on its back, or mount it inside the electrical cabinet through the screw holes at the four corners of the receiver.
2. Погледнете го нашиот дијаграм за поврзување на приемникот, споредете го со вашата опрема на лице место, and connect the equipment to the receiver with cables.
3. After the receiver is fixed in place, install the supporting antenna of the receiver properly. Mount or place the outer end of the antenna outside the electrical cabinet. It is recommended to place it on the top of the electrical cabinet for optimal signal performance. Do not leave the antenna uninstalled or place it inside the electrical cabinet; otherwise, signal failure may occur.
4. Конечно, turn on the remote control power switch, then you can remotely operate the machine via the remote control.
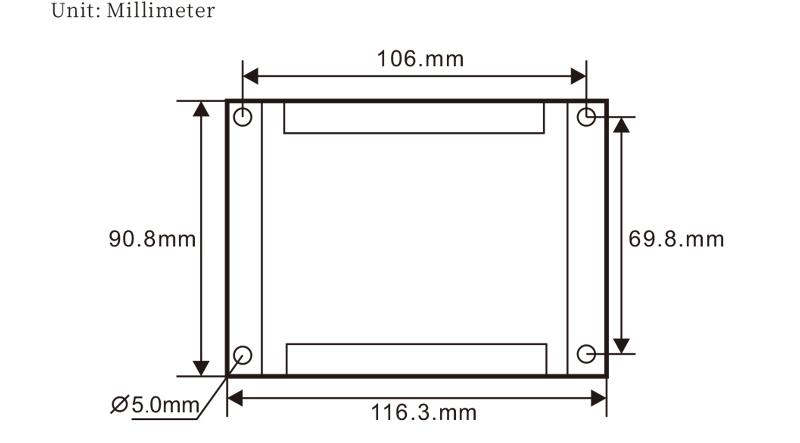
6.2 Receiver Installation Dimensions
6.3 Референтен дијаграм за поврзување на ресиверот
7. Инструкции за работа на производот
1. Вклучете ја машината и ресиверот. The receiver operation indicator flashes. After the wireless electronic remote control is fully charged, toggle it from the OFF gear to the X-axis gear, and the remote control display lights up.
2. Select the axis : Притиснете и задржете го копчето за овозможување, toggle the axis selection switch to select the axis to be operated.
3. Select the magnification: Притиснете и задржете го копчето за овозможување, toggle the magnification switch to select the required magnification gear.
4. Axis movement: Притиснете и задржете го копчето за овозможување, select the axis selection switch and the magnification switch, then rotate the pulse encoder. Rotate clockwise to move the axis in the positive direction, and rotate counterclockwise to move the axis in the negative direction.
5. Притиснете и задржете кое било прилагодено копче, the corresponding button IO output of the receiver will turn on; release the button, and the output will turn off.
6. Притиснете го копчето за итно стопирање, the corresponding emergency stop IO output of the receiver disconnects and the remote control function becomes invalid. Release the emergency stop button, the emergency stop IO output closes and the remote control function is restored.
7. If the wireless remote control is not operated for a period of time, автоматски ќе влезе во режим на мирување за да ја намали потрошувачката на енергија. It can be used normally again by pressing the enable button again.
8.If the wireless remote control is not used for a long time, turn the axis switch to OFF to turn off the power and extend battery life
8. Опис на моделот на производот
①:UWGP stands for appearance style.
②:Pulse Output Parameters:
01: Покажува дека излезниот пулсен сигнал е А, Б; Импулсен напон 5V; количина на пулс 100PPR.
02: Покажува дека излезниот пулсен сигнал е А, Б; Пулсен напон 12V; pulse quantity 25PPR.
03: Покажува дека излезниот пулсен сигнал е А, Б, А -, Б -; Импулсен напон 5V; количина на пулс 100PPR.
04: Покажува излез на отворено коло NPN на ниско ниво, со излезни импулсни сигнали од А и Б; The number of pulses is 100PPR.
05: Покажува излез на PNP извор на високо ниво, со излезни импулсни сигнали од А и Б; Бројот на импулси е 100 PPR.
③:Represents the axis selection switch quantity; 6 stands for 6 секири, 7 stands for 7 секири, and so on.
④: Represents the signal type of the axis selection switch.A stands for point-to-point output signal, and B stands for encoder output signal.
⑤: Represents the signal type of the magnification switch.A stands for point-to-point output signal, and B stands for encoder output signal.
⑥: Го претставува бројот на сопствени копчиња; 3 corresponds to 6 Прилагодени копчиња.
⑦: Represents the power supply for the system remote control. 05 stands for 5V power supply, и 24 stands for 24V power supply.
⑧: Represents the contact charging mode. It starts charging automatically when placed back on the charging base.
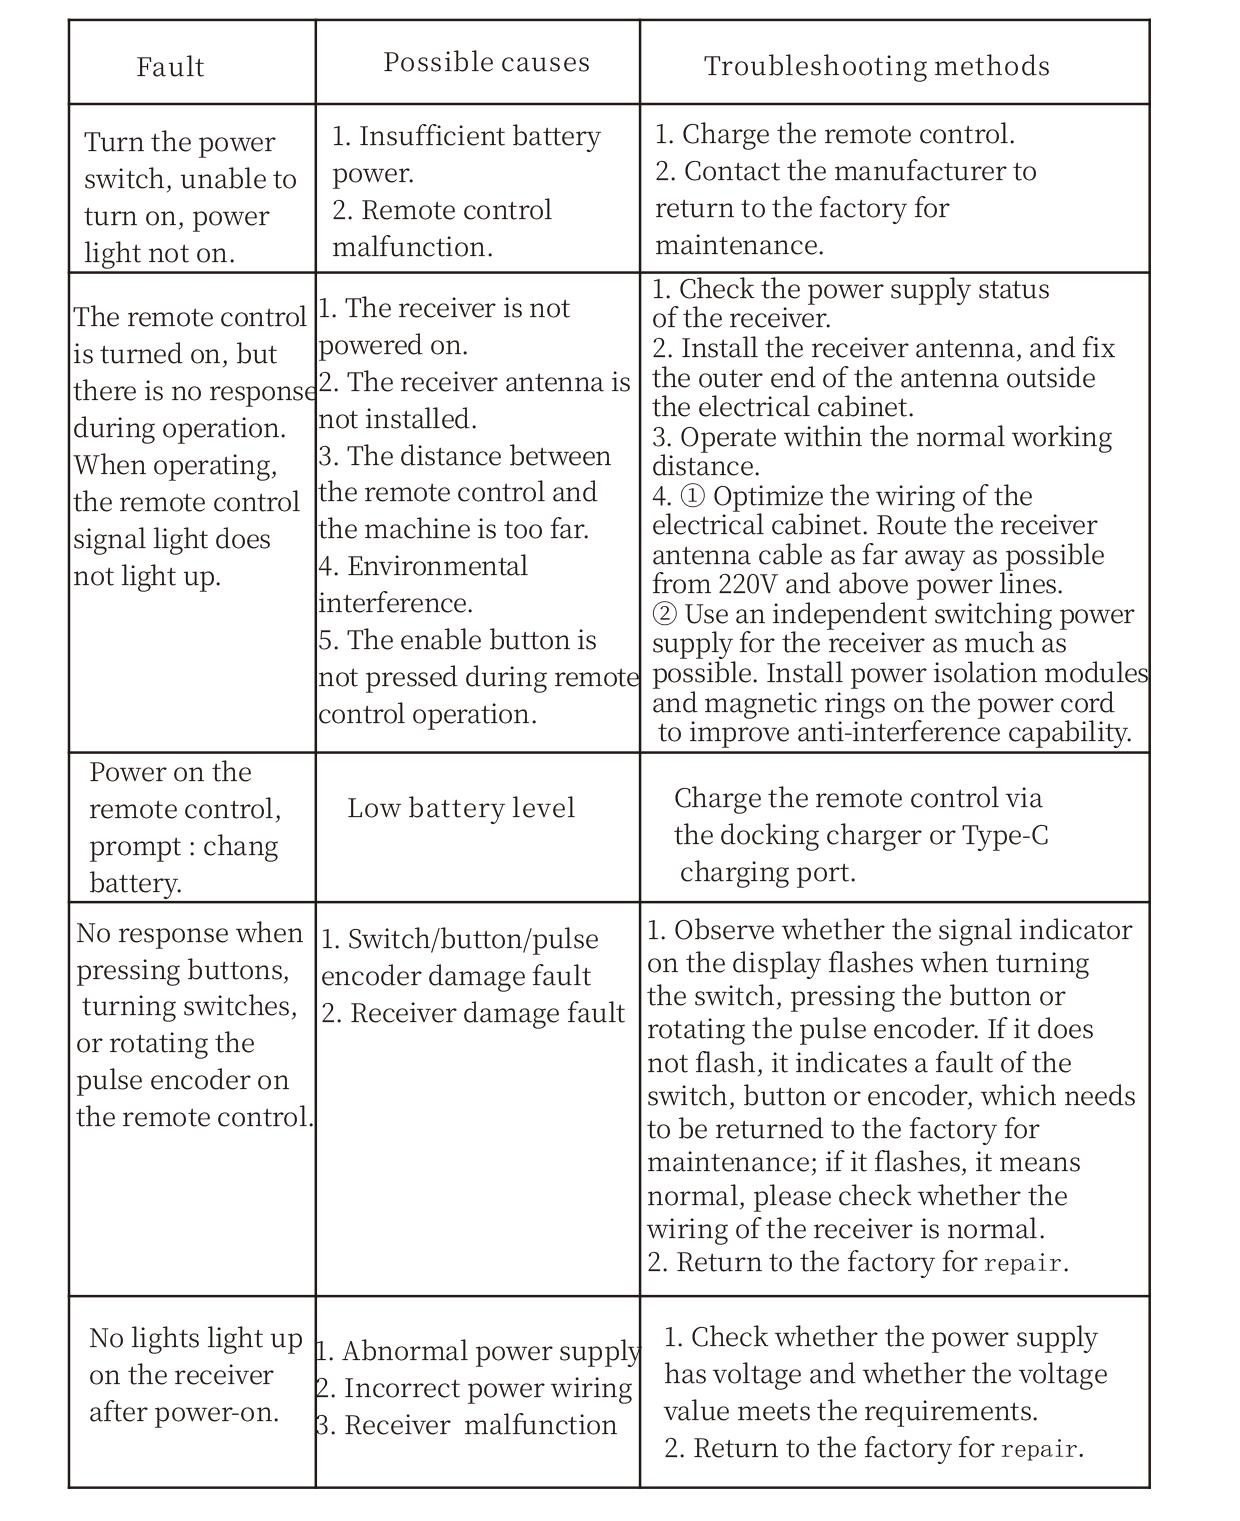
9. Решавање проблеми на производот
10. Maintenance and upkeep
1. Ве молиме користете го во сува средина на собна температура и притисок за да го продолжите работниот век.
2. Please avoid using in abnormal environments such as rain and water to extend the service life.
3. Please keep the appearance of the remote control clean to extend its service life.
4. Please avoid crushing, dropping, or bumping, итн. to prevent damage to the precision components inside the remote control or accuracy errors.
5. Ако не се користи долго време, please store the remote control in a clean and safe place.
6. Avoid moisture and shock during storage and transportation.
11. Информации за безбедност
1. Ве молиме внимателно прочитајте ги упатствата пред употреба и забранете непрофесионалци да работат.
2. Please charge the remote control in a timely manner when the battery level is too low, to avoid malfunction and operational errors caused by insufficient power.
3. If you repair it yourself and cause damage, the warranty will be void.