Подржава 2 Прилагодљиви тастери, са ИО сигналном сигналом;
Подржава -2 контрола осе;
Подржава контролу увећања на 3 нивоа;

1.Увод производа
2. Функционалне карактеристике производа
| Радни напон и струја бежичног даљинског управљача |
3В/14МА
|
| Спецификације батерије | 2 АА алкалне батерије, величина 5 |
| Нисконапонски алармни опсег бежичног даљинског управљача | < 2.3У |
| Напон напајања пријемника | ДЦ5В-24В/А |
| Опсег излазног оптерећења пријемника за хитно заустављање | АЦ125В-1А/ДЦ30В-2А |
| Пријемник омогућава опсег излазног оптерећења |
АЦ125В-1А/ДЦ30В-2А
|
| Опсег излазног оптерећења прилагођеног дугмета пријемника | ДЦ24В/50мА |
| Опсег излазног оптерећења за избор осовине пријемника | ДЦ24В/50мА |
| Опсег излазног оптерећења за увећање пријемника | ДЦ24В/50мА |
| Снага преноса ручног терминала |
15дБм
|
| Пријемник прима осетљивост | -100дБм |
| Фреквенција бежичне комуникације | 433МХз фреквенцијски опсег |
| Удаљеност бежичне комуникације | Удаљеност без баријера од 40 метар |
| Радна температура | -25℃ < К < 55℃ |
| Висина против пада | 1 (метар) |
| Прилагођена количина дугмета | 2 |


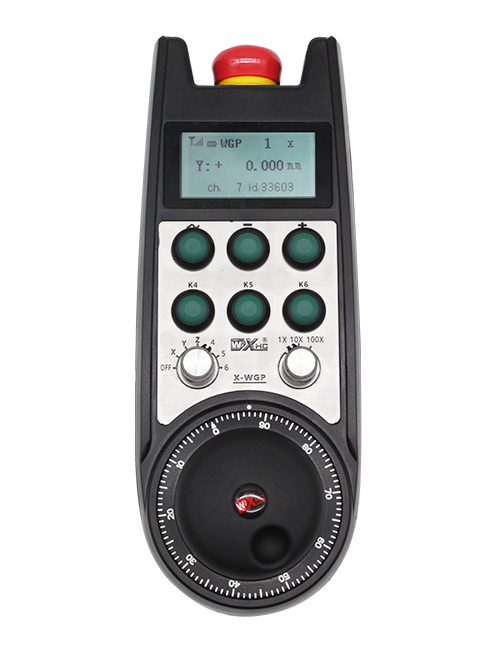
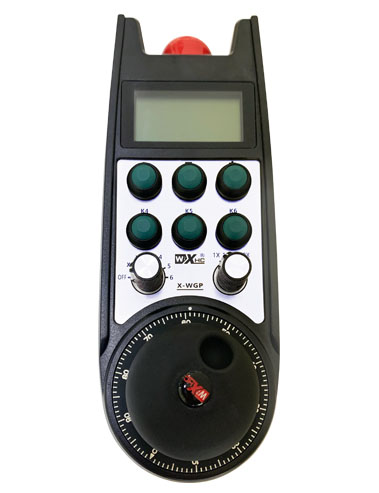
① Пулсни енкодер:
Притисните и држите дугме за укључивање, протрести пулсни енкодер, емитују пулсни сигнал,и контролише кретање осе машине.
② Дугме за укључивање:
Притисните било које дугме за омогућавање са обе стране, а два сета омогућавања ИО излаза на пријемнику ће водити. Отпустите дугме за укључивање да бисте искључили омогућени ИО излаз; И пре него што промените увећање за избор осе и протресете ручни точак,дугме за омогућавање мора да се држи притиснуто да би било ефикасно; Ова функција се може отказати преко конфигурационог софтвера.
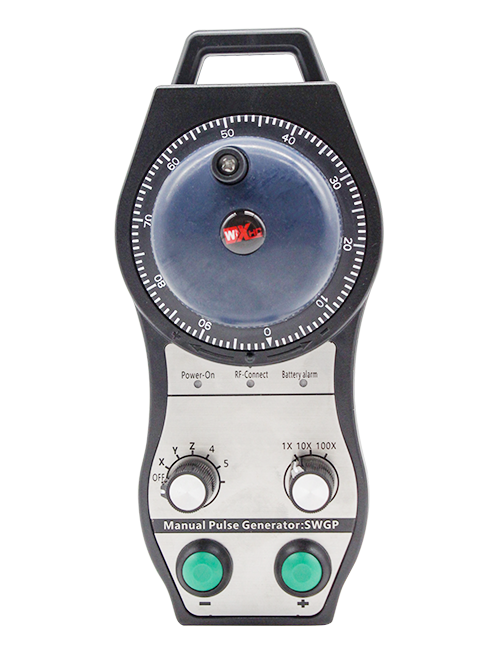
③ Индикаторска светла:
Лево бочно светло: напајање на светло,ручни точак користи осу да изабере ОФФ за укључивање, и ова лампица остаје упаљена након укључивања;
Средње светло: сигнална лампица која се пали када користите било коју функцију ручног точка, и не светли када нема операције;
Десно светло: Алармна лампица ниског напона, низак ниво батерије,ово светло трепери или остаје укључено, батерију треба заменити.
④ Дугме за хитно заустављање:
Притисните дугме за заустављање у нужди, и два сета ИО излаза за хитно заустављање на пријемнику ће бити искључена, и све функције ручног точка ће бити неважеће.
⑤ Прекидач за увећање:
Притисните и држите дугме за укључивање да бисте променили прекидач за увећање, који може да мења увећање које контролише ручни точак.
⑥ Прекидач за избор осе (прекидач за напајање):
Притисните и држите дугме за омогућавање да бисте променили прекидач за избор осе, који може да мења осовину кретања којом управља ручни точак. Пребаците овај прекидач са ОФФ на било коју осу и укључите напајање ручног точка.
⑦ Прилагођено дугме:
Два прилагођена дугмета, сваки одговара ИО излазној тачки на пријемнику.

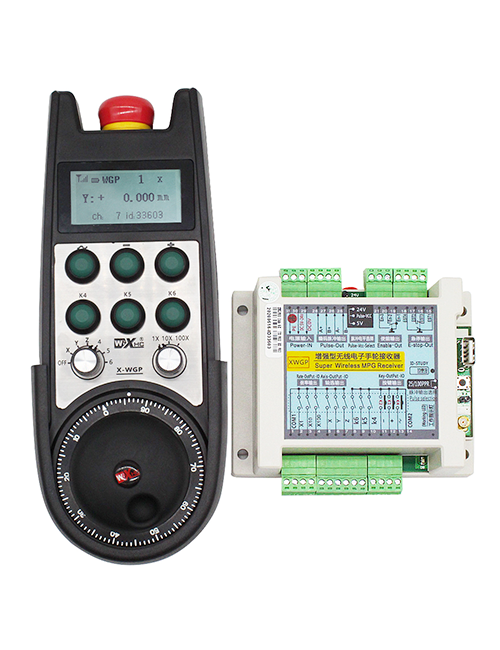
1. Инсталирајте пријемник у електрични ормарић кроз копчу на полеђини, или га уградите у кућиште кроз рупе за завртње на четири угла пријемника.
2. Погледајте наш дијаграм ожичења пријемника и упоредите га са вашом опремом на лицу места. Повежите опрему са пријемником преко каблова.
3.Након што је пријемник правилно фиксиран, Антена опремљена пријемником мора бити повезана, а спољни крај антене треба поставити или поставити ван електро ормана. Препоручује се поставити на врх електричног ормара за најбољи ефекат сигнала. Забрањено је остављати антену неповезану или је постављати у електрични орман, јер то може довести до тога да сигнал буде неупотребљив.
4. Коначно, укључите прекидач за напајање ручног точка, а машином можете управљати даљински помоћу ручног точка.
6.2 Димензије инсталације пријемника

6.3 Референтни дијаграм ожичења пријемника

7. Упутство за употребу производа
1. Укључите машину и пријемник. Индикатор рада пријемника трепери. Инсталирајте батерију у бежични електронски ручни точак, причврстите поклопац батерије, и
укључите прекидач за напајање бежичног електронског ручног точка. Индикатор нивоа батерије на ручном точку је укључен.
2. Изаберите координатну осу: Притисните и држите дугме за укључивање, пребаците прекидач за избор осе, и изаберите осу којом желите да управљате.
3. Изаберите увећање: Притисните и држите дугме за укључивање, пребаците прекидач за увећање,и изаберите жељени ниво увећања.
4. Покретна осовина: Притисните и држите дугме за укључивање, изаберите прекидач за избор осе, изаберите прекидач за увећање, а затим ротирати пулсни енкодер. Ротирајте у смеру казаљке на сату да бисте померили
позитивне осе и супротно од казаљке на сату да бисте померили негативну осу.
5. Притисните и држите било које прилагођено дугме, и одговарајући тастер ИО излаз пријемника ће бити укључен. Отпустите дугме, а излаз ће бити искључен.
6. Притисните дугме за заустављање у нужди, одговарајући ИО излаз за хитно заустављање пријемника ће бити искључен, функција ручног точка ће бити онемогућена,отпустите дугме за заустављање у нужди, ИО излаз за хитно заустављање ће бити затворен, и функција ручног точка ће бити враћена.
7. Ако се ручни точак не користи неко време, аутоматски ће ући у режим мировања како би се смањила потрошња енергије. Када се поново употреби, ручни точак се може активирати притиском на дугме за укључивање.
8. Ако се ручни точак не користи дуже време, препоручљиво је пребацити осовину ручног точка у положај ОФФ, искључите напајање ручног точка, и продужи век трајања батерије.
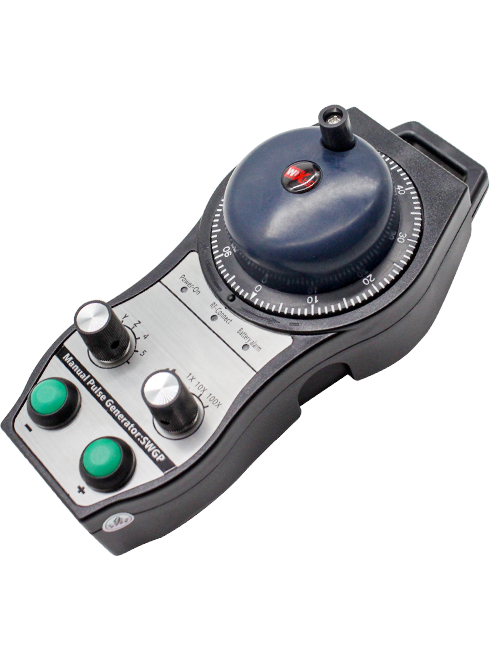
8. Опис модела производа

① :ЗТВГП представља стил изгледа
②:Параметри импулсног излаза:
01: Означава да је импулсни излазни сигнал А, Б; Импулсни напон 5В; количина импулса 100ППР.
02:Означава да су импулсни излазни сигнали А и Б; Импулсни напон 12В; количина импулса 100ППР.
03:Означава да су импулсни излазни сигнали А, Б, А -, Б -; Импулсни напон 5В; количина импулса 100ППР.
04:Означава излаз отвореног кола ниског нивоа НПН, са импулсним излазним сигналима А и Б;Број импулса је 100ППР.
05:Означава излаз ПНП извора високог нивоа, са импулсним излазним сигналима А и Б; Број импулса је 100ППР.
③:Представља број прекидача за избор осовине, 2 представља 2 секире.
④:Представља тип сигнала прекидача за избор осе, А представља излазни сигнал од тачке до тачке, а Б представља кодирани излазни сигнал.
⑤:Представља тип сигнала прекидача за множење, А представља излазни сигнал од тачке до тачке, а Б представља кодирани излазни сигнал.
⑥:Представља број прилагођених дугмади, 2 представља 2 Прилагођени тастери.
⑦:Представља напајање за системски ручни точак, и 05 представља напајање од 5В.
⑧:Л представља леву колону (леви држач ножа), а Р представља десну колону (десни држач ножа).
9.Решење за кварове производа

1. Користите га у сувом окружењу на собној температури и притиску да бисте продужили свој радни век.
2. Избегавајте употребу у ненормалним окружењима као што су киша и мехурићи воде да бисте продужили радни век услуге.
3. Одржавајте изглед ручног точка чистим да бисте продужили његов радни век.
4. Избегавајте стискање, падајући, бумпинг, итд. да спречи оштећење прецизних компоненти унутар ручног точка или грешке у прецизности.
5. Ако се не користи дуже време, молимо чувајте ручни точак на чистом и безбедном месту. За време складиштења и транспорта, Пажња треба посветити отпорности на влагу и удару.
11. Информације о безбедности
1. Молимо пажљиво прочитајте упутства пре употребе и забраните професионалцима да оперишу.
2. Замените батерију на време када је ниво батерије пренизак да бисте избегли грешке узроковане недовољним напајањем батерије и немогућношћу управљања ручним точком.
3. Ако је потребно поправљање, Молимо контактирајте произвођача. Ако је штета узрокована само поправкама, Произвођач неће пружити гаранцију