Toetus 2 Kohandatavad nupud, lüliti tüüpi IO signaali väljundiga;
Toetus -2 teljekontroll;
Toetab 3-taseme suurenduskontrolli;

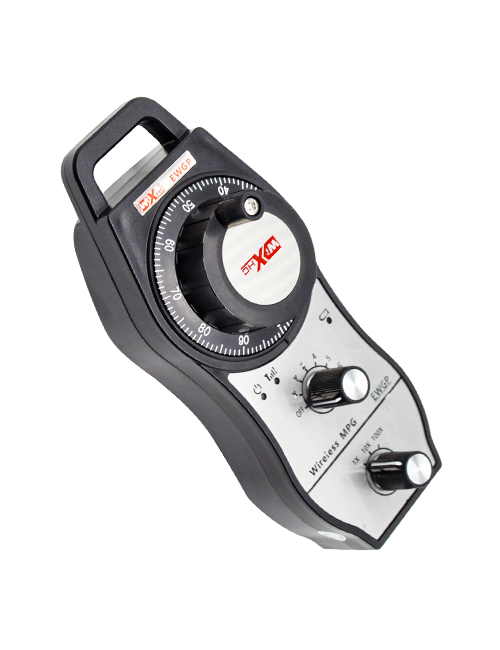
1.Toote sissejuhatus
2. Toote funktsionaalsed omadused
| Juhtmeta kaugjuhtimispuldi tööpinge ja vool |
3V/14MA
|
| Aku tehnilised andmed | 2 AA leelispatareid, suurus 5 |
| Juhtmeta kaugjuhtimispuldi madalpinge häirevahemik | < 2.3V |
| Vastuvõtja toiteallika pinge | DC5V-24V/A |
| Vastuvõtja hädaseiskamise väljundkoormusvahemik | AC125V-1A/DC30V-2A |
| Vastuvõtja lubab väljundkoormuse vahemikku |
AC125V-1A/DC30V-2A
|
| Vastuvõtja kohandatud nupu väljundkoormuse vahemik | DC24V/50mA |
| Vastuvõtja telje valiku väljundkoormusvahemik | DC24V/50mA |
| Vastuvõtja suurenduse väljundkoormusvahemik | DC24V/50mA |
| Käsiterminali edastusvõimsus |
15dBm
|
| Vastuvõtja vastuvõtu tundlikkus | -100dBm |
| Traadita side sagedus | 433MHz sagedusriba |
| Traadita side kaugus | Barjäärivaba kaugus 40 meeter |
| Töötemperatuur | -25℃ < X < 55℃ |
| Kukkumisvastane kõrgus | 1 (meeter) |
| Kohandatud nupu kogus | 2 |


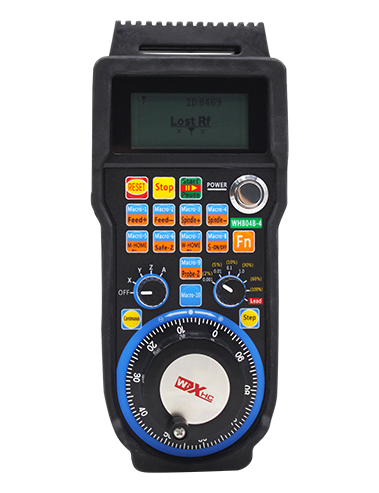
① Impulsskooder:
Vajutage ja hoidke all lubamisnuppu, raputage pulsiandurit, väljastada impulsssignaali,ja juhtida masina telje liikumist.
② Luba nupp:
Vajutage mõlemal küljel ükskõik millist lubamisnuppu, ja vastuvõtja kaks lubamise IO väljundit juhivad. Lubamise IO väljundi lahtiühendamiseks vabastage lubamisnupp; Ja enne telje valiku suurenduse vahetamist ja käsiratta raputamist,toimimiseks tuleb lubamisnuppu all hoida; Seda funktsiooni saab tühistada konfiguratsioonitarkvara kaudu.
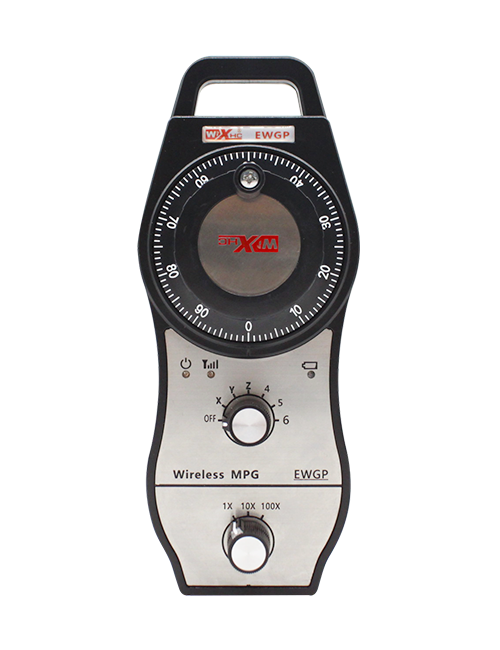
③ Märgutuled:
Vasakpoolne tuli: valguse sisselülitamine,käsiratas kasutab telge, et valida toite sisselülitamiseks VÄLJAS, ja see tuli jääb pärast sisselülitamist põlema;
Keskvalgus: signaaltuli, mis süttib käsiratta mis tahes funktsiooni kasutamisel, ja ei sütti, kui operatsiooni pole;
Parempoolne valgusti: Madalpinge häiretuli, madal aku tase,see tuli vilgub või jääb põlema, aku tuleb välja vahetada.
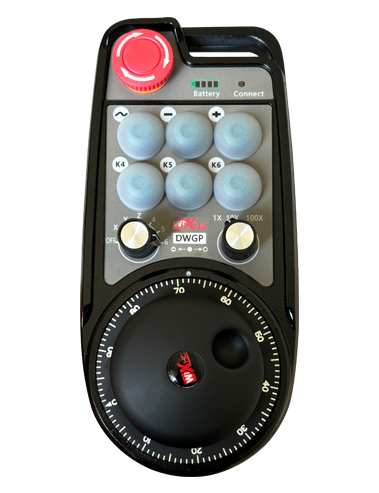
④ Hädaseiskamisnupp:
Vajutage hädaabipeatuse nuppu, ja vastuvõtja kaks hädaseiskamis-IO väljundi komplekti ühendatakse lahti, ja kõik käsiratta funktsioonid muutuvad kehtetuks.
⑤ Suurenduslüliti:
Suurenduslüliti vahetamiseks vajutage ja hoidke all lubamisnuppu, millega saab muuta käsirattaga juhitavat suurendust.
⑥ Telje valiku lüliti (toitelüliti):
Teljevaliku lüliti vahetamiseks vajutage ja hoidke all lubamisnuppu, millega saab vahetada käsirattaga juhitavat liikumistelge. Lülitage see lüliti asendist OFF suvalisele teljele ja lülitage käsiratta toide sisse.
⑦ Kohandatud nupp:
Kaks kohandatud nuppu, igaüks vastab vastuvõtja IO väljundpunktile.

1. Paigaldage vastuvõtja elektrikappi läbi tagaküljel oleva luku, või paigaldage see kappi läbi kruviaukude vastuvõtja nelja nurga all.
2. Vaadake meie vastuvõtja juhtmestiku skeemi ja võrrelge seda oma kohapealse seadmega. Ühendage seade kaablite kaudu vastuvõtjaga.
3.Pärast seda, kui vastuvõtja on korralikult fikseeritud, Vastuvõtjaga varustatud antenn tuleb ühendada, ja antenni välimine ots tuleks paigaldada või asetada väljaspool elektrikilpi. Parima signaaliefekti saamiseks on soovitatav asetada see elektri kapi ülaosale. Antenni on keelatud jätta ühendamata või asetada elektrikilpi, kuna see võib põhjustada signaali kasutuskõlbmatuks muutumist.
4. Lõpuks, lülitage sisse käsiratta toitelüliti, ja saate masinat käsirattaga kaugjuhtida.
6.2 Vastuvõtja installi mõõtmed

6.3 Vastuvõtja juhtmestiku võrdlusskeem

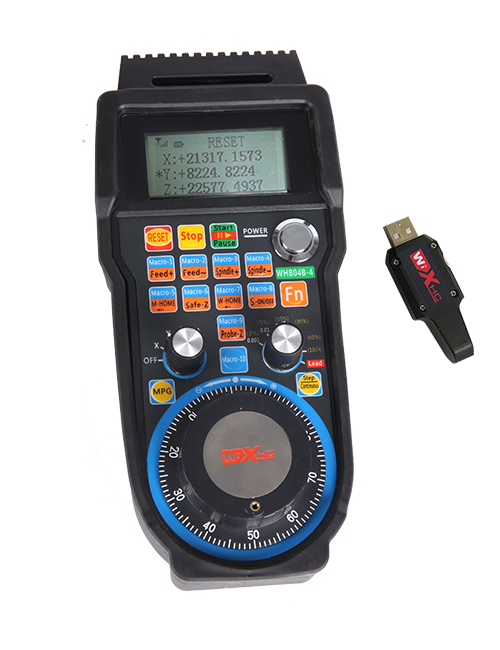
7. Toote toimimisjuhendid
1. Lülitage masin ja vastuvõtja sisse. Vastuvõtja töö indikaatortuli vilgub. Paigaldage aku juhtmevabasse elektroonilisse käsirattasse, kinnitage aku kate, ja
lülitage sisse juhtmevaba elektroonilise käsiratta toitelüliti. Käsiratta aku taseme indikaatortuli põleb.
2. Valige koordinaatide telg: Vajutage ja hoidke all lubamisnuppu, lülitage telje valiku lüliti sisse, ja valige telg, mida soovite kasutada.
3. Valige suurendus: Vajutage ja hoidke all lubamisnuppu, lülitage suurenduslüliti sisse,ja valige soovitud suurendusaste.
4. Liikuv telg: Vajutage ja hoidke all lubamisnuppu, valige telje valiku lüliti, valige suurenduslüliti, ja seejärel keerake impulsskooderit. Pöörake päripäeva, et liigutada
positiivne telg ja negatiivse telje liigutamiseks vastupäeva.
5. Vajutage ja hoidke all mis tahes kohandatud nuppu, ja vastuvõtja vastava nupu IO väljund lülitatakse sisse. Vabastage nupp, ja väljund lülitatakse välja.
6. Vajutage hädaabipeatuse nuppu, vastuvõtja vastav hädaseiskamise IO väljund katkestatakse, käsiratta funktsioon lülitatakse välja,vabastage hädaseiskamisnupp, hädaseiskamise IO väljund suletakse, ja käsiratta funktsioon taastatakse.
7. Kui käsiratast teatud aja jooksul ei kasutata, see lülitub energiatarbimise vähendamiseks automaatselt unerežiimi. Kui seda uuesti kasutatakse, käsiratast saab aktiveerida, vajutades lubamisnuppu.
8. Kui käsiratast pikka aega ei kasutata, on soovitatav lülitada käsiratta võll asendisse OFF, lülitage käsiratta toide välja, ja pikendada aku tööiga.
8. Toote mudeli kirjeldus

① :ZTWGP esindab välimuse stiili
②:Impulsi väljundi parameetrid:
01: Näitab, et impulsi väljundsignaal on A, B; Impulsspinge 5V; impulsi kogus 100PPR.
02:Näitab, et impulsi väljundsignaalid on A ja B; Impulsspinge 12V; impulsi kogus 100PPR.
03:Näitab, et impulsi väljundsignaalid on A, B, A -, B -; Impulsspinge 5V; impulsi kogus 100PPR.
04:Näitab madala taseme NPN avatud vooluahela väljundit, A ja B impulsi väljundsignaalidega;Impulsside arv on 100PPR.
05:Näitab kõrgetasemelist PNP-allika väljundit, A ja B impulsi väljundsignaalidega; Impulsside arv on 100PPR.
③:Näitab telje valiku lülitite arvu, 2 esindab 2 teljed.
④:Esindab telje valiku lüliti signaali tüüpi, A tähistab punktist punkti väljundsignaali, ja B tähistab kodeeritud väljundsignaali.
⑤:Esindab korrutamislüliti signaali tüüpi, A tähistab punktist punkti väljundsignaali, ja B tähistab kodeeritud väljundsignaali.
⑥:Esindab kohandatud nuppude arvu, 2 esindab 2 kohandatud nupud.
⑦:Esindab süsteemi käsiratta toiteallikat, ja 05 tähistab 5 V toiteallikat.
⑧:L tähistab vasakut veergu (vasakpoolne noahoidja), ja R tähistab parempoolset veergu (parempoolne noahoidja).
9.Toote rikete lahendus

1. Kasutage seda toatemperatuuril ja survel kuivas keskkonnas, et pikendada selle kasutusaega.
2. Vältige kasutamist ebanormaalsetes keskkondades, näiteks vihma ja veemullide kasutamist, et pikendada kasutusaja.
3. Palun hoidke käeratta välimus puhtaks, et pikendada selle kasutusaega.
4. Palun vältige pigistamist, langev, põrutamine, jne. et vältida käsiratta sees olevate täppiskomponentide kahjustamist või täpsusvigu.
5. Kui seda ei kasutata pikka aega, Hoidke käeratta puhta ja turvalises kohas. Ladustamise ja transpordi ajal, Tähelepanu tuleks pöörata niiskusele ja löögikindlusele.
11. Ohutusteave
1. Enne kasutamist lugege juhised hoolikalt ja keelake mitteprofessionaalidel tegutseda.
2. Palun vahetage aku õigeaegselt, kui aku laetuse tase on liiga madal, et vältida vigu, mis on põhjustatud aku ebapiisavast võimsusest ja suutmatusest käsiratast juhtida..
3. Kui remonti on vajalik, Palun pöörduge tootja poole. Kui kahju põhjustab enese parandamine, tootja ei anna garantii