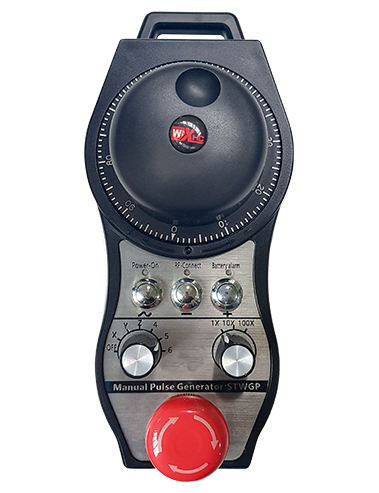
Terîf
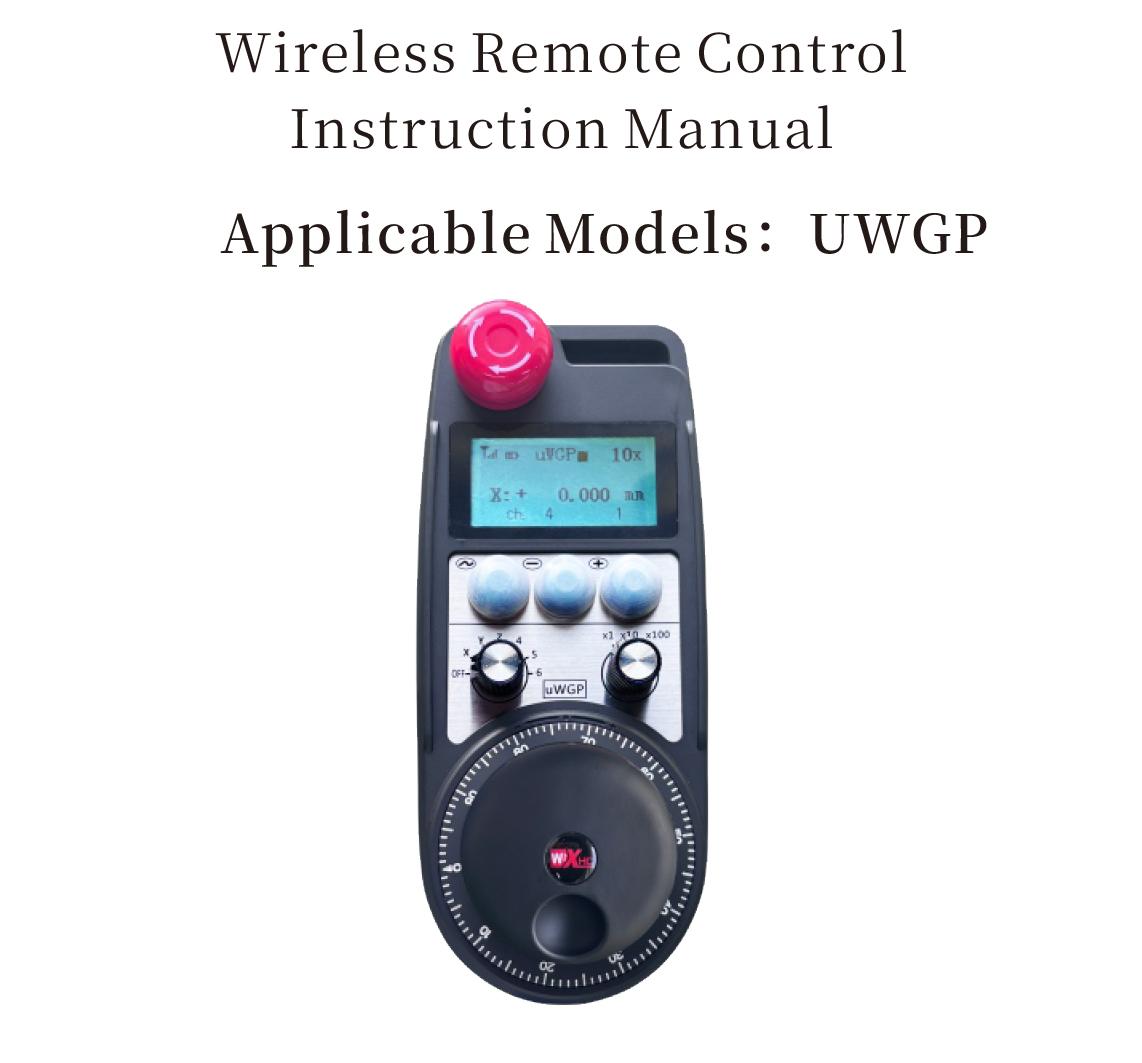
1.Nasandina Hilberê
Wireless Remote Control is used for manual guidance, positioning, tool setting and other operations of CNC machine tools. Ev hilber teknolojiya veguheztina wireless qebûl dike, tasfiyekirina girêdana têl biharê kevneşop, kêmkirina têkçûna alavên ku ji hêla kabloyan ve têne çêkirin, ji holê rakirina dezawantajên kabloyê kişandin, lekeyên rûnê, etc., and is more convenient to operate.It is widely applicable to CNC machine tools such as gantry machining centers, gantry vertical lathes, and CNC gear processing machines, and is compatible with various mainstream CNC system brands on the market, including Siemens, Mitsubishi, Kelik, Syntec and more.
2.taybetmendiyên Product
1. Teknolojiya pêwendiya bêserûber a 433 MHz bi dûrahiya xebitandina bêtêlê dipejirîne 20 metre.
2.Hilkişîna frekansa Adaptive; 32 komên kontrolên ji dûr ve yên bêtêl dikarin bi hevdemî bêyî destwerdanê werin bikar anîn.
3.Supports the emergency stop button, and the emergency stop button remains effective even after the remote control is powered off.
4.Piştgirî dike 3 bişkokên xwerû yên bi guheztina derana sînyala IO.
5.Kontrola 6-axis piştgirî dike, û 7 ji bo kontrolkirina 12-xebata xwerû ye.
6. Kontrola mezinkirina 3-leza piştgirî dike, û kontrola mezinkirina 4-leza xwerû ye.
7.fonksiyona bişkojka çalakkirinê piştgirî dike, ku dikare îşaretên IO-yê biguhezîne derxe, û her weha hilbijartina eksê jî kontrol bikin, mezinkirin û şîfrekirin.
8.Guhertina celebê kodkirina hilbijartina eksê û mezinkirina bi nermalavê piştgirî dike.
9. Supports pulse encoder with specification of 100 pêlên her şoreşê.
10. Supports standard Type-C charging with 5V-2A charging specification; built-in battery
specification: 14500 / 1100mAh.
3. Specifications Product
| Working Voltage and Current of Handheld Terminal |
3.7V/20.0mA |
| Charging Battery Specification |
3.7V/14500/1100mAh
|
| Low Voltage Alarm Range of Handheld Terminal |
<3.35V |
| Receiver Power Supply Voltage |
DC5V-24V/1A |
| Receiver Emergency Stop Output Load Range |
AC125V-1A/DC30V-2A |
| Receiver Enable Output Load Range |
AC125V-1A/DC30V-2A |
| Receiver Custom Button Output Load Range |
DC24V/50mA
|
| Receiver Axis Selection Output Load Range |
DC24V/50mA |
| Receiver magnification Output Load Range |
DC24V/50mA |
| Handheld Terminal Transmit Power |
15dBm
|
| Receiver wergirtina hestiyariyê |
-100dBm |
| Frekansa pêwendiya Wireless |
433Bandora frekansa MHz
|
| Wireless Communication Distance |
20 meters barrier-free distance
|
| Operating Temperature |
-25℃<X<55℃ |
| Safe drop height |
1 M
|
| Number of Custom Buttons |
3
|
| Product Weight |
546.86(g) |
| Product Dimensions |
200*87*72(mm) |
4. Pêşgotin Fonksiyona Hilberê
Têbînî:
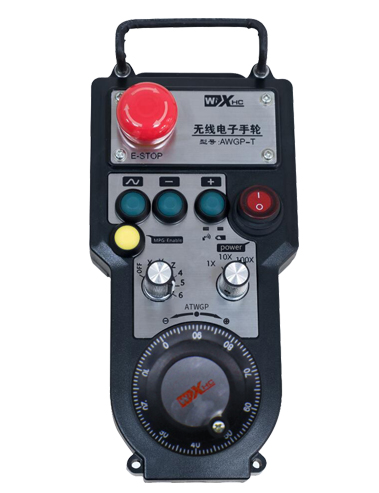
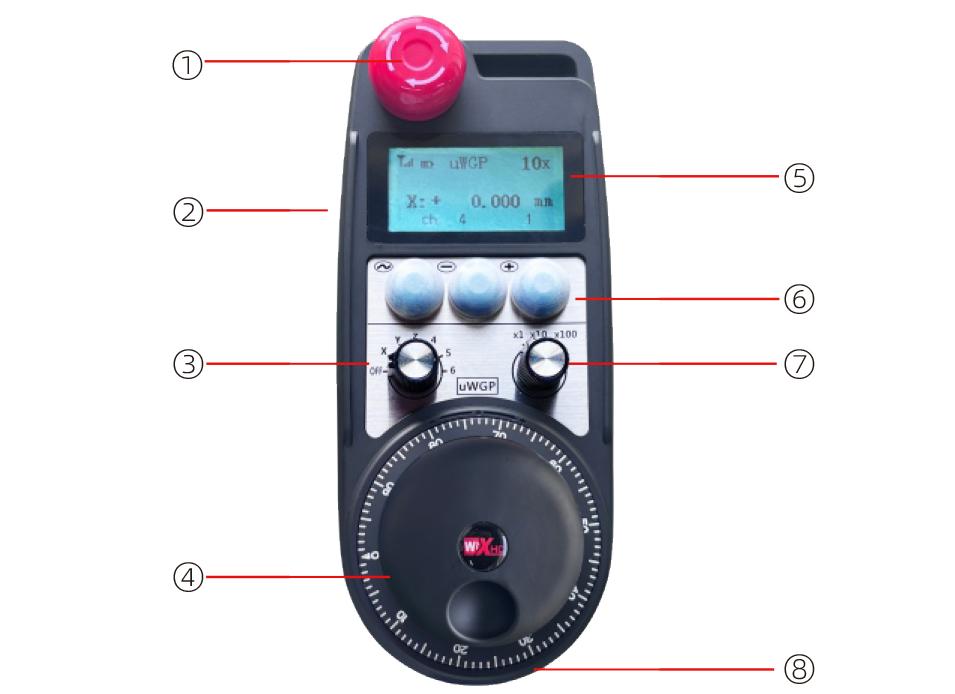
① Emergency Stop Button:
Bişkojka rawestandina acîl bikirtînin, the two groups of emergency stop IO outputs on the receiver will disconnect, and all remote control functions will be invalidated.Release the emergency stop button, the emergency stop IO outputs on the receiver will be closed, and all remote control functions will be restored. Herwisa, even if the remote control is powered off, pressing the emergency stop button can still activate the emergency stop IO output of the receiver.
② Enable Button:
Press either enable button on both sides, the two sets of enable IO outputs on the receiver will conduct. Release the enable button, and the enable IO outputs will disconnect. It is necessary to press and hold the enable button before toggling axis selection, magnification or rotating the remote control for the operation to take effect.This function can be canceled through the configuration software.
③ Axis Selection Switch (Power Switch):
Bişkojka çalak bikirtînin û bigirin, then toggling the axis selection switch can control the movement of axis .Press and hold the enable button, then toggle the axis selection switch to switch the motion axis controlled by the remote control. Toggle the switch from the OFF position to any axis position, and the remote control will power on automatically.
④ Pulse Encoder:
Press and hold the enable button and rotate the pulse encoder, it will output pulse signals to control the movement of the machine axis.
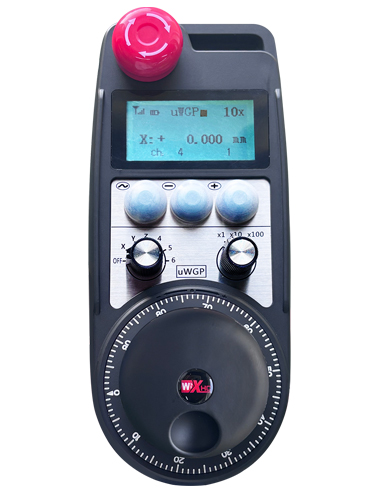
⑤ LCD Display Screen:
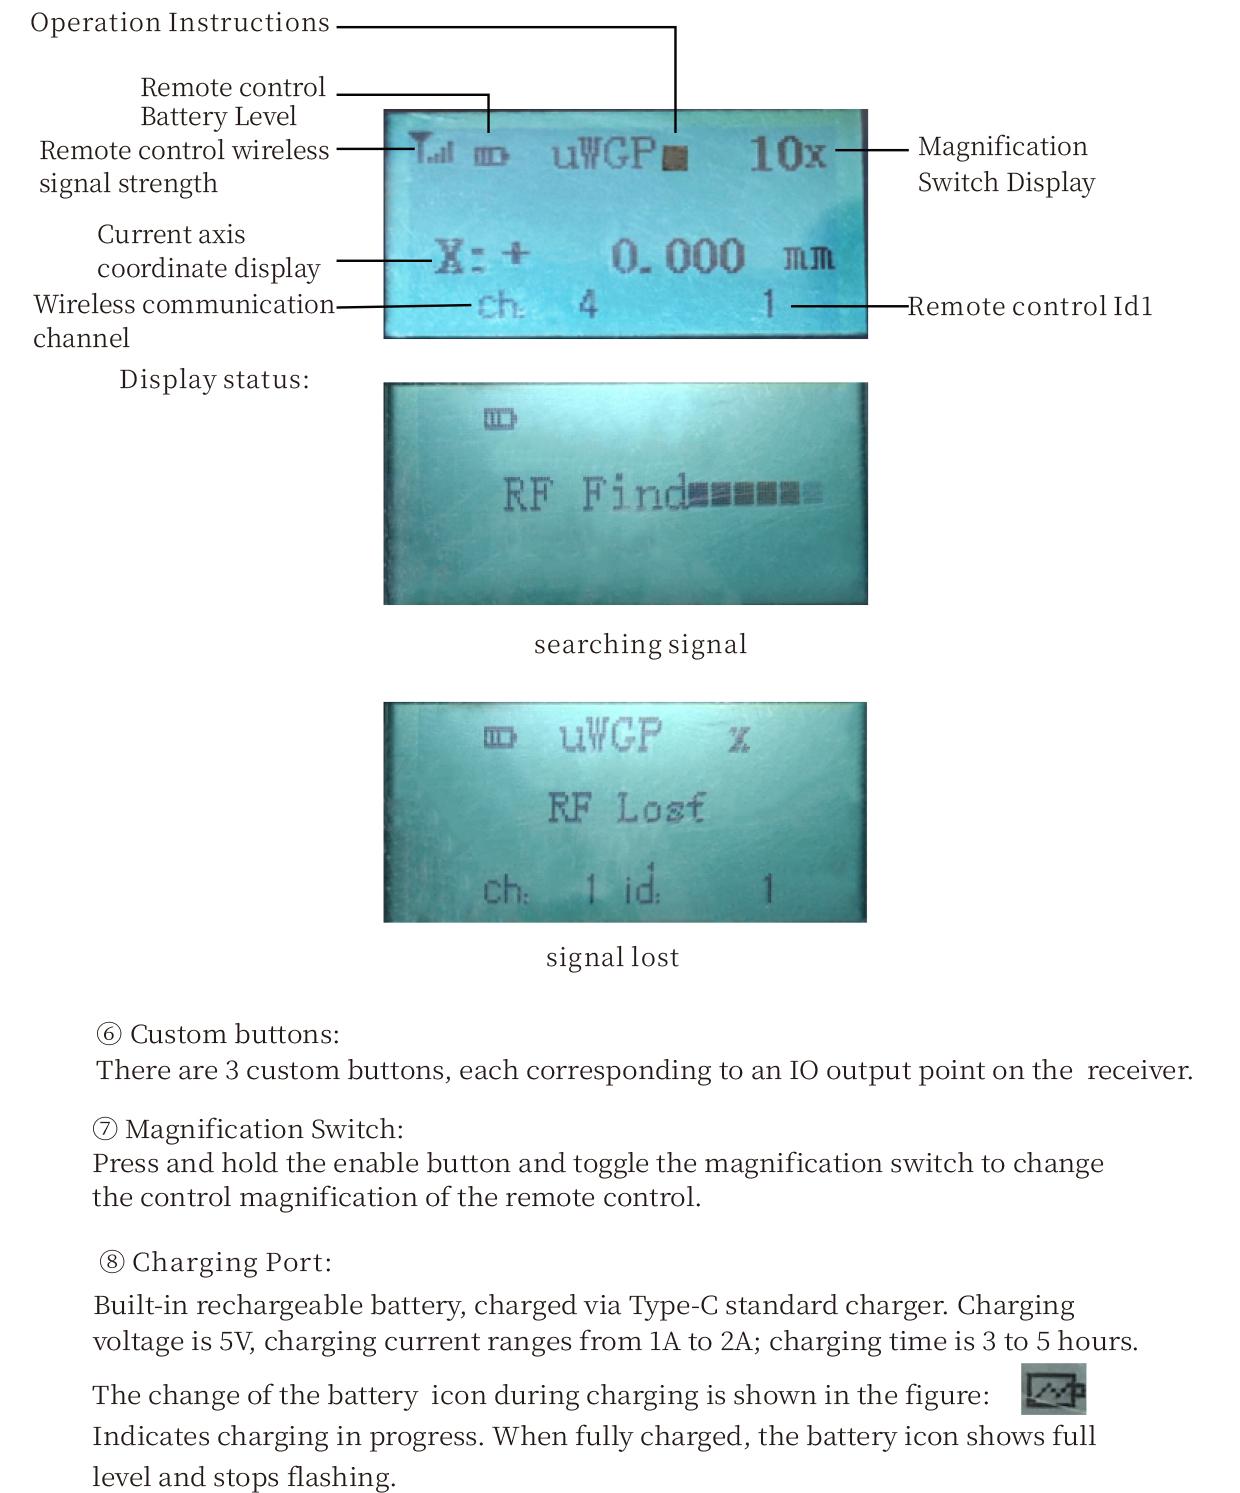
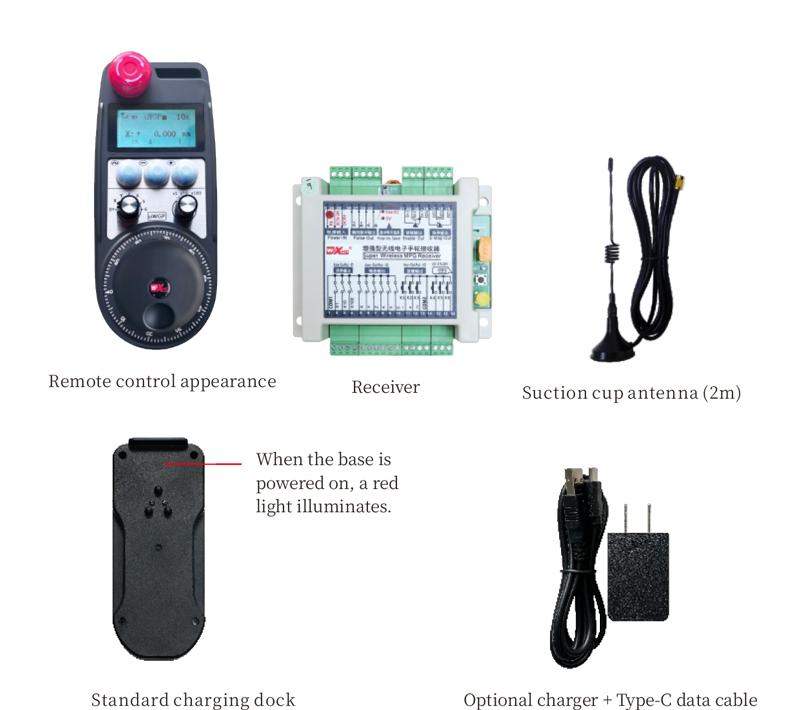
5. Product Accessories Diagram
6. Rêbernameya Sazkirina Hilberê
6.1 Gavên Sazkirina Hilberê
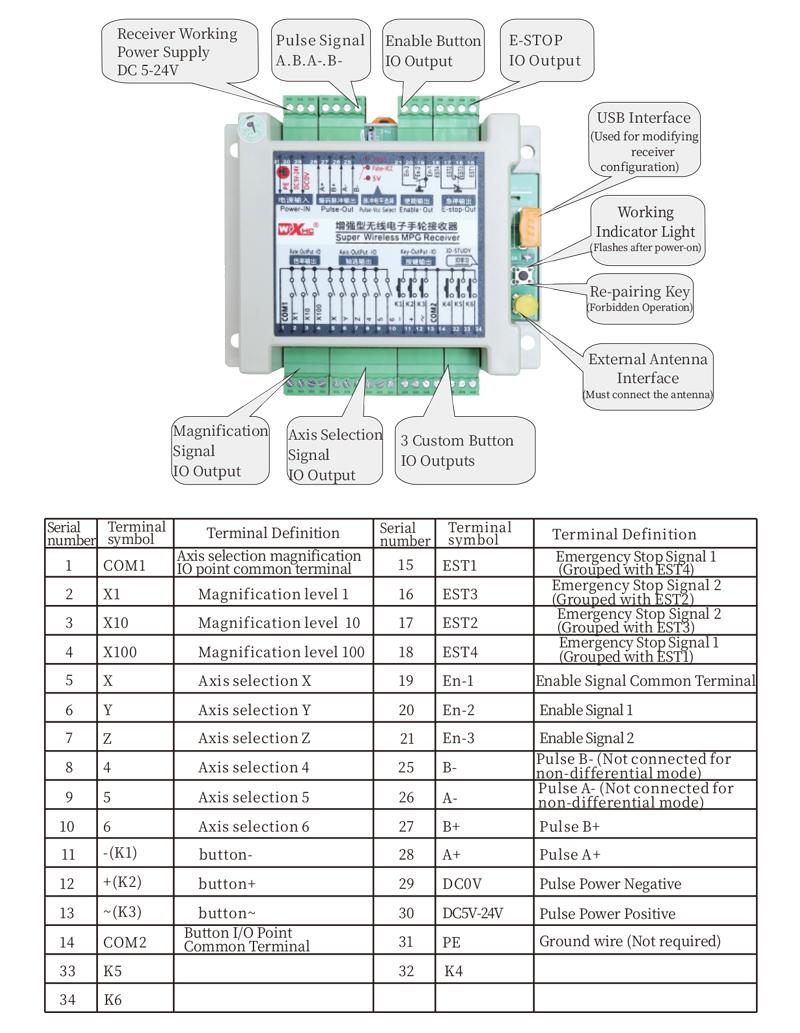
1. Install the receiver in the electrical cabinet via the buckle on its back, or mount it inside the electrical cabinet through the screw holes at the four corners of the receiver.
2. Binêre diagrama têlgirêdana wergirê me, wê bi alavên xwe yên li ser malperê re bidin hev, and connect the equipment to the receiver with cables.
3. After the receiver is fixed in place, install the supporting antenna of the receiver properly. Mount or place the outer end of the antenna outside the electrical cabinet. It is recommended to place it on the top of the electrical cabinet for optimal signal performance. Do not leave the antenna uninstalled or place it inside the electrical cabinet; wekî din, signal failure may occur.
4. Paşan, turn on the remote control power switch, then you can remotely operate the machine via the remote control.
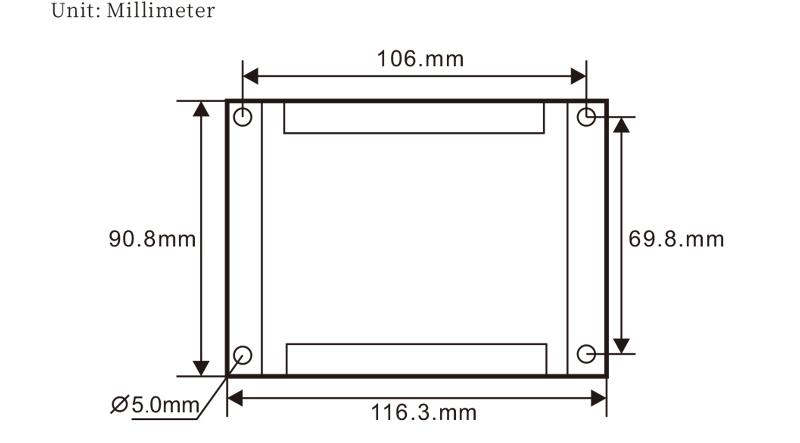
6.2 Receiver Installation Dimensions
6.3 Receiver Wiring Reference Diagram
7. Talîmatên Operasyona Hilberê
1. Hêza li ser makîne û wergirê. The receiver operation indicator flashes. After the wireless electronic remote control is fully charged, toggle it from the OFF gear to the X-axis gear, and the remote control display lights up.
2. Select the axis : Bişkojka çalak bikirtînin û bigirin, toggle the axis selection switch to select the axis to be operated.
3. Select the magnification: Bişkojka çalak bikirtînin û bigirin, toggle the magnification switch to select the required magnification gear.
4. Axis movement: Bişkojka çalak bikirtînin û bigirin, select the axis selection switch and the magnification switch, then rotate the pulse encoder. Rotate clockwise to move the axis in the positive direction, and rotate counterclockwise to move the axis in the negative direction.
5. Bişkojkek xwerû bikirtînin û bigirin, the corresponding button IO output of the receiver will turn on; release the button, and the output will turn off.
6. Bişkojka rawestandina acîl bikirtînin, the corresponding emergency stop IO output of the receiver disconnects and the remote control function becomes invalid. Release the emergency stop button, the emergency stop IO output closes and the remote control function is restored.
7. If the wireless remote control is not operated for a period of time, ew ê bixweber bikeve moda xewê da ku xerckirina hêzê kêm bike. It can be used normally again by pressing the enable button again.
8.If the wireless remote control is not used for a long time, turn the axis switch to OFF to turn off the power and extend battery life
8. Danasîna Modela Hilberê
①:UWGP stands for appearance style.
②:Pulse Output Parameters:
01: Nîşan dide ku sînyala derana pêlê A ye, B; Pulse voltaja 5V; mîqdara nebza 100PPR.
02: Nîşan dide ku sînyala derana pêlê A ye, B; Pulse voltaja 12V; pulse quantity 25PPR.
03: Nîşan dide ku sînyala derana pêlê A ye, B, YEK -, B -; Pulse voltaja 5V; mîqdara nebza 100PPR.
04: NPN-a-asta nizm derketinek dorhêla vekirî nîşan dide, bi sînyalên derana nebza A û B; The number of pulses is 100PPR.
05: Derketina çavkaniya PNP-a asta bilind destnîşan dike, bi sînyalên derana nebza A û B; Hejmara pêlan 100PPR e.
③:Represents the axis selection switch quantity; 6 stands for 6 eksê, 7 stands for 7 eksê, and so on.
④: Represents the signal type of the axis selection switch.A stands for point-to-point output signal, and B stands for encoder output signal.
⑤: Represents the signal type of the magnification switch.A stands for point-to-point output signal, and B stands for encoder output signal.
⑥: Hejmara bişkokên xwerû destnîşan dike; 3 corresponds to 6 Bişkojkên xwerû.
⑦: Represents the power supply for the system remote control. 05 stands for 5V power supply, û 24 stands for 24V power supply.
⑧: Represents the contact charging mode. It starts charging automatically when placed back on the charging base.
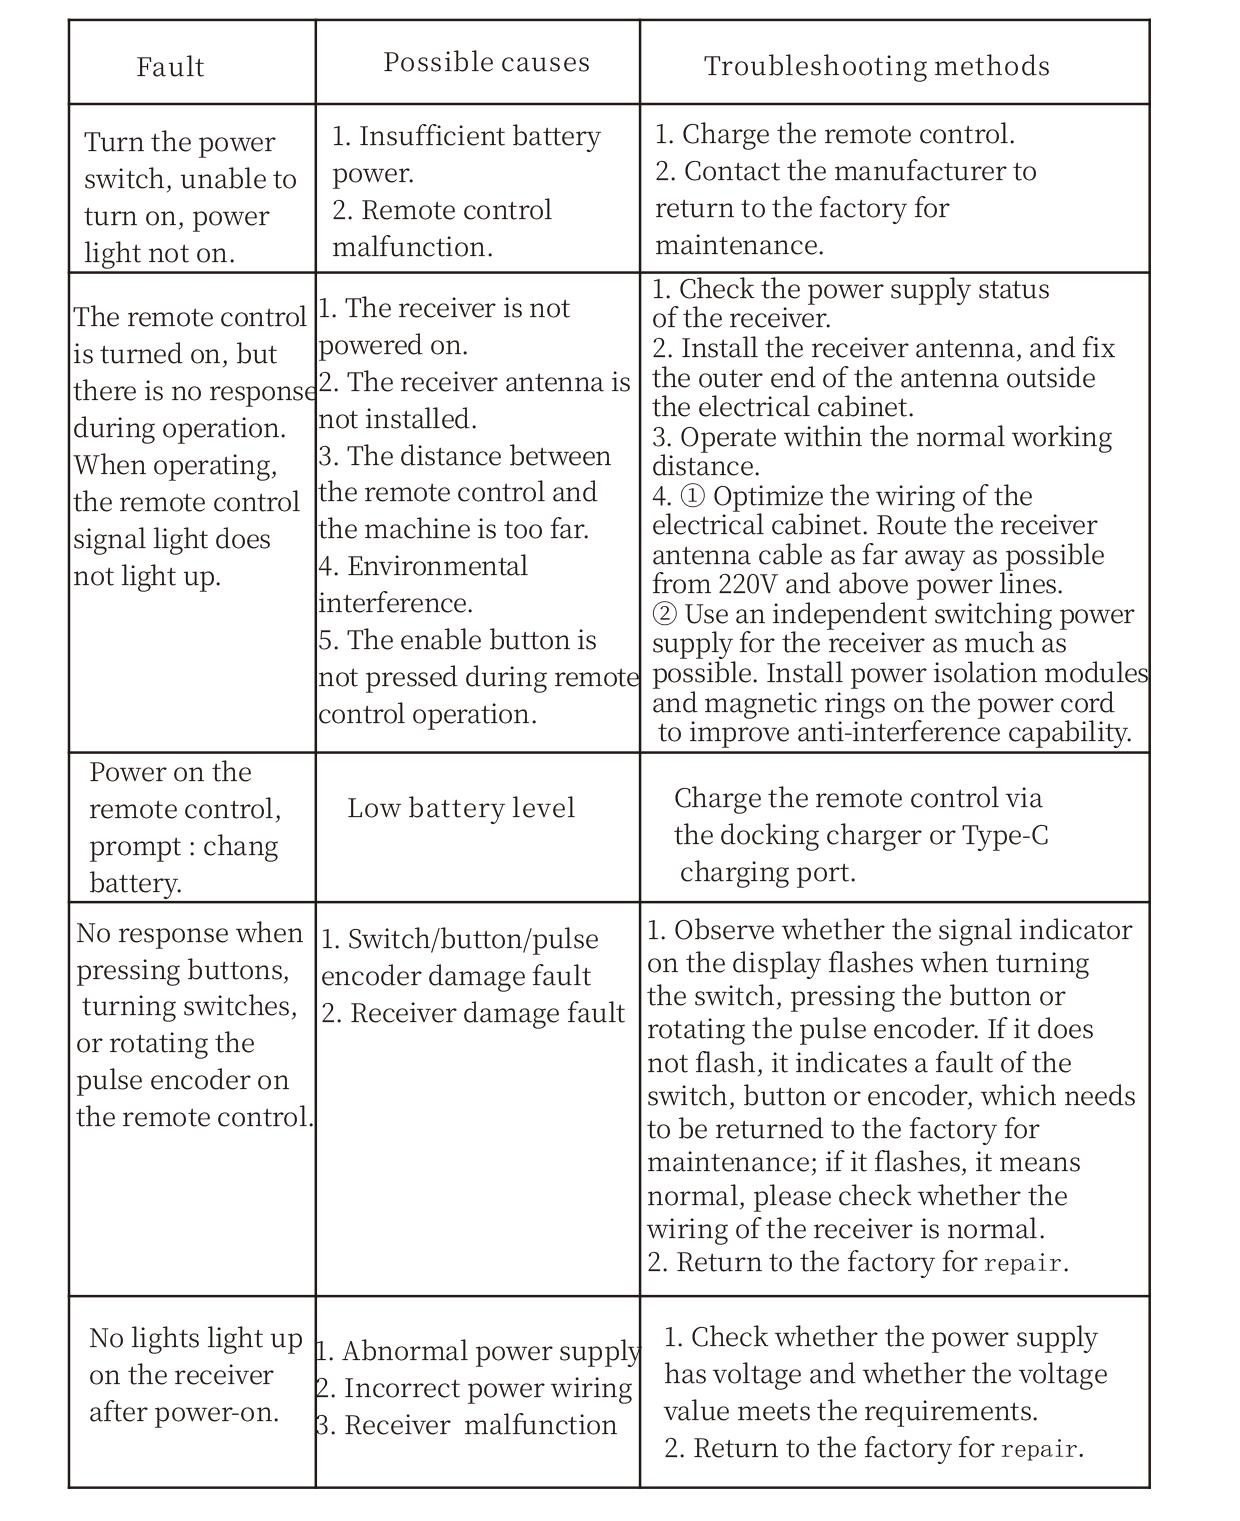
9. Pirsgirêkên hilberê
10. Maintenance and upkeep
1. Ji kerema xwe wê li hawîrdorek hişk di germahiya odeyê û zextê de bikar bînin da ku jiyana karûbarê wê dirêj bikin.
2. Please avoid using in abnormal environments such as rain and water to extend the service life.
3. Please keep the appearance of the remote control clean to extend its service life.
4. Please avoid crushing, dropping, or bumping, hwd. to prevent damage to the precision components inside the remote control or accuracy errors.
5. Heke ji bo demek dirêj neyê bikaranîn, please store the remote control in a clean and safe place.
6. Avoid moisture and shock during storage and transportation.
11. Agahiyên Ewlekariyê
1. Ji kerema xwe berî ku bikar bînin rêwerzan bi baldarî bixwînin û ne pisporan ji xebatê qedexe bikin.
2. Please charge the remote control in a timely manner when the battery level is too low, to avoid malfunction and operational errors caused by insufficient power.
3. If you repair it yourself and cause damage, the warranty will be void.