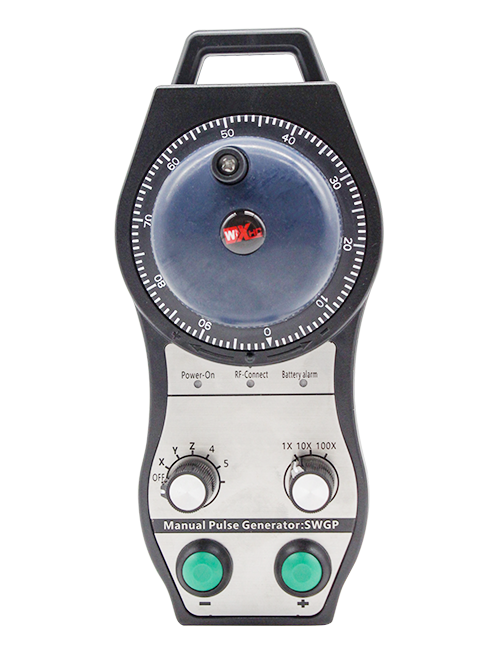
Understøtter 2 Tilpasbare knapper, med switch-type IO-signaludgang;
Understøtter -2 Axis kontrol;
Understøtter forstørrelseskontrol på 3 niveauer;

1.Produktintroduktion
2. Produktfunktionelle funktioner
| Operating voltage and current of wireless remote |
3V/14MA
|
| Battery specifications | 2 AA alkaline batteries, size 5 |
| Low voltage alarm range of wireless remote | < 2.3V |
| Modtagerens strømforsyningsspænding | DC5V-24V/A |
| Receiver emergency stop output load range | AC125V-1A/DC30V-2A |
| Receiver enable output load range |
AC125V-1A/DC30V-2A
|
| Receiver custom button output load range | DC24V/50mA |
| Receiver axis selection output load range | DC24V/50mA |
| Receiver magnification output load range | DC24V/50mA |
| Transmission power of handheld terminal |
15dBm
|
| Receiver receiving sensitivity | -100dBm |
| Wireless communication frequency | 433MHz frequency band |
| Wireless communication distance | Barrier free distance of 40 meter |
| Operation temperature | -25℃ < X < 55℃ |
| Anti fall height | 1 (måler) |
| Custom button quantity | 2 |


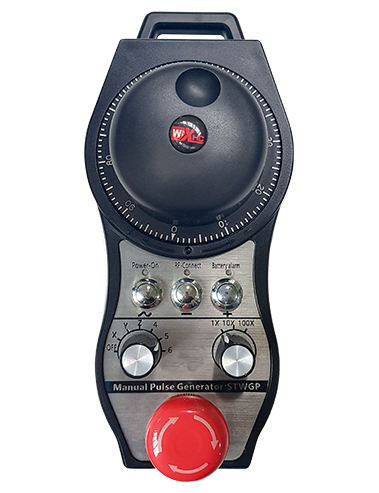
① Pulse encoder:
Tryk på og hold aktiveringsknappen nede, ryst pulsgiveren, udsende et pulssignal,and control the movement ofthe machine axis.
② Enable button:
Press either enable button on either side, and the two sets of enable IO outputs on the receiver will conduct. Release the enable button to disconnect the enable IO output; And before switching the axis selection magnification and shaking the handwheel,the enable button needs to be held down to be effective; This function can be cancelled through configuration software.
③ Indicator lights:
Left side light: power on light,the handwheel uses the axis to select OFF for power on, and this light stays on after power on;
Middle light: a signal light that lights up when operating any function ofthe handwheel, and does not light up when there is no operation;
Right side light: Alarmlys med lav spænding, low battery level,this lightflashes or stays on, battery needs to be replaced.
④ Emergency stop button:
Tryk på nødstopknappen, og de to sæt nødstop IO-udgange på modtageren vil blive afbrudt, og alle håndhjulets funktioner vil være ugyldige.
⑤ Magnification switch:
Press and hold the enable button to switch the magnification switch, which can switch the magnification controlled by the handwheel.
⑥ Axis selection switch (strømafbryder):
Press and hold the enable button to switch the axis selection switch, which can switch the movement axis controlled by the handwheel. Switch this switch from OFF to any axis and turn on the handwheel power.
⑦ Custom button:
Two custom buttons, hver svarende til et IO-udgangspunkt på modtageren.

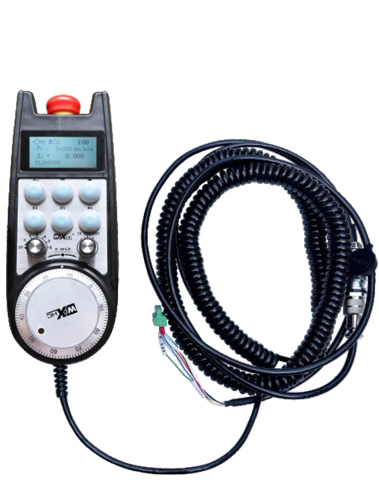
1. Installer modtageren i det elektriske skab gennem spændet på ryggen, Eller installer det i skabet gennem skruehullerne i de fire hjørner af modtageren.
2. Se vores modtagerledningsdiagram og sammenlign det med dit udstyr på stedet. Connect the equipment to the receiver via cables.
3.After the receiver is properly fixed, antennen udstyret med modtageren skal tilsluttes, and the outer end of the antenna should be installed or placed outside the electrical cabinet. Det anbefales at placere det på toppen af det elektriske skab for den bedste signaleffekt. It is prohibited to leave the antenna unconnected or place it inside the electrical cabinet, as this may result in the signal being unusable.
4. Endelig, turn on the power switch of the handwheel, and you can operate the machine remotely using the handwheel.
6.2 Modtagerinstallationsdimensioner

6.3 Modtager ledningsreferencediagram

7. Produktoperationsinstruktioner
1. Power on the machine and the receiver. The receiver’s working indicator light flashes. Install the battery in the wireless electronic handwheel, secure the battery cover, og
turn on the power switch of the wireless electronic handwheel. The handwheel’s battery level indicator light is on.
2. Vælg koordinataksen: Tryk på og hold aktiveringsknappen nede, toggle the axis selection switch, and select the axis you want to operate.
3. Vælg forstørrelse: Tryk på og hold aktiveringsknappen nede, toggle the magnification switch,and select the desired magnification level.
4. Bevægelig akse: Tryk på og hold aktiveringsknappen nede, vælg kontakten til valg af akse, vælg forstørrelseskontakten, and then rotate the pulse encoder. Rotate clockwise to move the
positive axis and counterclockwise to move the negative axis.
5. Tryk og hold en vilkårlig brugerdefineret knap nede, and the corresponding button IO output of the receiver will be turned on. Release the button, and the output will be turned off.
6. Tryk på nødstopknappen, den tilsvarende nødstop IO-udgang fra modtageren vil blive afbrudt, håndhjulsfunktionen deaktiveres,slip nødstopknappen, nødstop IO-udgangen vil blive lukket, og håndhjulsfunktionen vil blive genoprettet.
7. Hvis håndhjulet ikke betjenes i en periode, it will automatically enter sleep mode to reduce power consumption. Når den bruges igen, the handwheel can be activated by pressing the enable button.
8. Hvis håndhjulet ikke bruges i længere tid, it is recommended to switch the handwheel shaft to the OFF position, slå håndhjulet fra, og forlænge batteriets levetid.
8. Produktmodelbeskrivelse

① :ZTWGP represents the appearance style
②:Pulsudgangsparametre:
01: Indicates that the pulse output signal is A, B; Pulsspænding 5V; pulse quantity 100PPR.
02:Indicating thatthe pulse output signals are A and B; Pulse voltage 12V; pulse quantity 100PPR.
03:Indicating thatthe pulse output signals are A, B, A -, B -; Pulsspænding 5V; pulse quantity 100PPR.
04:Angiver en lav-niveau NPN åben kredsløbsudgang, med pulsudgangssignaler på A og B;The number of pulses is 100PPR.
05:Angiver PNP-kildeoutput på højt niveau, med pulsudgangssignaler på A og B; The number of pulses is 100PPR.
③:Representing the number of axis selection switches, 2 repræsenterer 2 akser.
④:Represents the type of axis selection switch signal, A repræsenterer punkt-til-punkt udgangssignal, og B repræsenterer kodet udgangssignal.
⑤:Represents the type of multiplication switch signal, A repræsenterer punkt-til-punkt udgangssignal, og B repræsenterer kodet udgangssignal.
⑥:Represents the number of custom buttons, 2 repræsenterer 2 Brugerdefinerede knapper.
⑦:Represents the power supply for the system handwheel, og 05 repræsenterer 5V strømforsyning.
⑧:L represents the left column (left knife holder), and R represents the right column (right knife holder).
9.Solution to Product Malfunctions

1. Brug det i et tørt miljø ved stuetemperatur og pres for at udvide sit levetid.
2. Undgå at bruge i unormale miljøer såsom regn og vandbobler for at forlænge levetiden.
3. Hold håndhjulets udseende rent for at forlænge dets levetid.
4. Undgå venligst at klemme, falder, støde, osv. for at forhindre beskadigelse af præcisionskomponenterne inde i håndhjulet eller nøjagtighedsfejl.
5. Hvis ikke brugt i lang tid, Opbevar håndhjulet på et rent og sikkert sted. Under opbevaring og transport, Der skal rettes opmærksomhed på fugt- og stødmodstand.
11. Sikkerhedsoplysninger
1. Læs instruktionerne omhyggeligt inden brug og forbyder ikke -fagfolk at operere.
2. Please replace the battery in a timely manner when the battery level is too low to avoid errors caused by insufficient battery power and inability to operate the handwheel.
3. Hvis reparation er påkrævet, Kontakt producenten. Hvis skaden er forårsaget af selvreparation, producenten giver ikke garanti