Στήριξη 2 προσαρμόσιμα κουμπιά, με έξοδο σήματος τύπου διακόπτη IO;
Στήριξη -2 έλεγχος άξονα;
Υποστηρίζει έλεγχο μεγέθυνσης 3 επιπέδων;

1.Εισαγωγή προϊόντος
2. Λειτουργικές λειτουργίες προϊόντος
| Operating voltage and current of wireless remote |
3V/14MA
|
| Battery specifications | 2 AA alkaline batteries, size 5 |
| Low voltage alarm range of wireless remote | < 2.3V |
| Τάση τροφοδοσίας δέκτη | DC5V-24V/A |
| Receiver emergency stop output load range | AC125V-1A/DC30V-2A |
| Receiver enable output load range |
AC125V-1A/DC30V-2A
|
| Receiver custom button output load range | DC24V/50mA |
| Receiver axis selection output load range | DC24V/50mA |
| Receiver magnification output load range | DC24V/50mA |
| Transmission power of handheld terminal |
15dBm
|
| Receiver receiving sensitivity | -100dBm |
| Wireless communication frequency | 433MHz frequency band |
| Wireless communication distance | Barrier free distance of 40 μέτρα |
| Operation temperature | -25℃ < X < 55℃ |
| Anti fall height | 1 (μέτρο) |
| Custom button quantity | 2 |


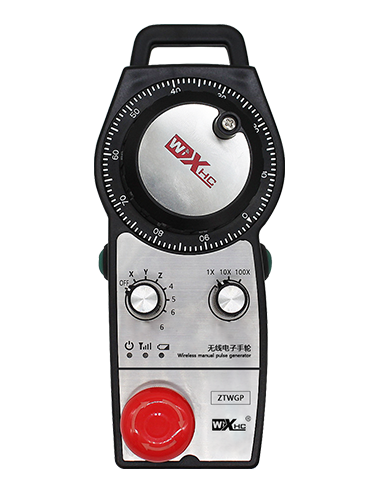
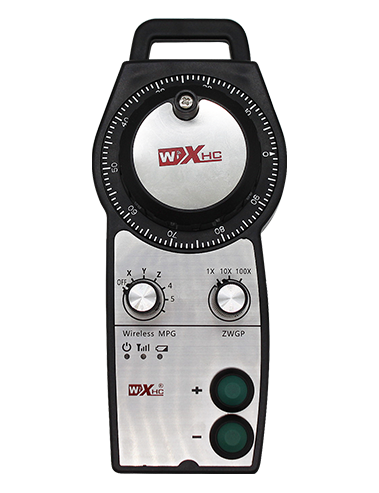
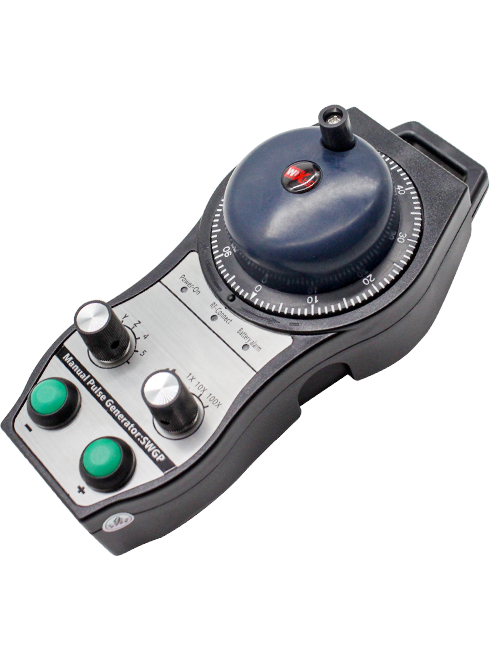
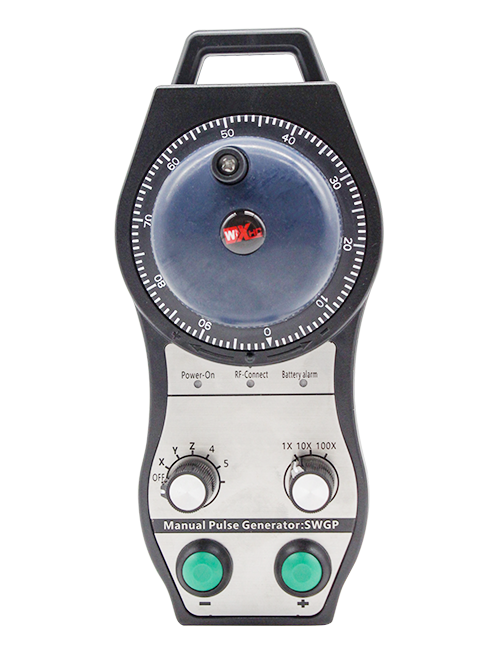
① Pulse encoder:
Πατήστε και κρατήστε πατημένο το κουμπί ενεργοποίησης, ανακινήστε τον κωδικοποιητή παλμών, εκπέμπουν ένα παλμικό σήμα,and control the movement ofthe machine axis.
② Enable button:
Press either enable button on either side, and the two sets of enable IO outputs on the receiver will conduct. Release the enable button to disconnect the enable IO output; And before switching the axis selection magnification and shaking the handwheel,the enable button needs to be held down to be effective; This function can be cancelled through configuration software.
③ Indicator lights:
Left side light: power on light,the handwheel uses the axis to select OFF for power on, and this light stays on after power on;
Middle light: a signal light that lights up when operating any function ofthe handwheel, and does not light up when there is no operation;
Right side light: Φως συναγερμού χαμηλής τάσης, low battery level,this lightflashes or stays on, battery needs to be replaced.
④ Emergency stop button:
Πατήστε το κουμπί διακοπής έκτακτης ανάγκης, και τα δύο σετ εξόδων IO διακοπής έκτακτης ανάγκης στον δέκτη θα αποσυνδεθούν, και όλες οι λειτουργίες του χειροτροχού θα είναι άκυρες.
⑤ Magnification switch:
Press and hold the enable button to switch the magnification switch, which can switch the magnification controlled by the handwheel.
⑥ Axis selection switch (διακόπτη τροφοδοσίας):
Press and hold the enable button to switch the axis selection switch, which can switch the movement axis controlled by the handwheel. Switch this switch from OFF to any axis and turn on the handwheel power.
⑦ Custom button:
Two custom buttons, το καθένα αντιστοιχεί σε ένα σημείο εξόδου IO στον δέκτη.

1. Εγκαταστήστε τον δέκτη στο ηλεκτρικό ντουλάπι μέσω της πόρπης στο πίσω μέρος, ή να το εγκαταστήσετε στο ντουλάπι μέσω των οπών των βιδών στις τέσσερις γωνίες του δέκτη.
2. Ανατρέξτε στο διάγραμμα καλωδίωσης του δέκτη και το συγκρίνετε με τον εξοπλισμό σας στο χώρο. Connect the equipment to the receiver via cables.
3.After the receiver is properly fixed, πρέπει να συνδεθεί η κεραία που είναι εξοπλισμένη με τον δέκτη, and the outer end of the antenna should be installed or placed outside the electrical cabinet. Συνιστάται να το τοποθετήσετε στην κορυφή του ηλεκτρικού ντουλαπιού για το καλύτερο φαινόμενο σήματος. It is prohibited to leave the antenna unconnected or place it inside the electrical cabinet, as this may result in the signal being unusable.
4. Τελικά, turn on the power switch of the handwheel, and you can operate the machine remotely using the handwheel.
6.2 Διαστάσεις εγκατάστασης δέκτη

6.3 Διάγραμμα αναφοράς καλωδίωσης δέκτη

7. Οδηγίες λειτουργίας προϊόντος
1. Power on the machine and the receiver. The receiver’s working indicator light flashes. Install the battery in the wireless electronic handwheel, secure the battery cover, και
turn on the power switch of the wireless electronic handwheel. The handwheel’s battery level indicator light is on.
2. Επιλέξτε τον άξονα συντεταγμένων: Πατήστε και κρατήστε πατημένο το κουμπί ενεργοποίησης, toggle the axis selection switch, and select the axis you want to operate.
3. Επιλέξτε μεγέθυνση: Πατήστε και κρατήστε πατημένο το κουμπί ενεργοποίησης, toggle the magnification switch,and select the desired magnification level.
4. Κινούμενος άξονας: Πατήστε και κρατήστε πατημένο το κουμπί ενεργοποίησης, επιλέξτε το διακόπτη επιλογής άξονα, επιλέξτε το διακόπτη μεγέθυνσης, and then rotate the pulse encoder. Rotate clockwise to move the
positive axis and counterclockwise to move the negative axis.
5. Πατήστε παρατεταμένα οποιοδήποτε προσαρμοσμένο κουμπί, and the corresponding button IO output of the receiver will be turned on. Release the button, and the output will be turned off.
6. Πατήστε το κουμπί διακοπής έκτακτης ανάγκης, η αντίστοιχη έξοδος IO διακοπής έκτακτης ανάγκης του δέκτη θα αποσυνδεθεί, η λειτουργία χειροτροχού θα απενεργοποιηθεί,αφήστε το κουμπί διακοπής έκτακτης ανάγκης, η έξοδος IO διακοπής έκτακτης ανάγκης θα κλείσει, και η λειτουργία του χειροτροχού θα αποκατασταθεί.
7. Εάν ο χειροτροχός δεν λειτουργεί για κάποιο χρονικό διάστημα, it will automatically enter sleep mode to reduce power consumption. Όταν χρησιμοποιηθεί ξανά, the handwheel can be activated by pressing the enable button.
8. Εάν ο χειροτροχός δεν χρησιμοποιείται για μεγάλο χρονικό διάστημα, it is recommended to switch the handwheel shaft to the OFF position, απενεργοποιήστε την τροφοδοσία του χειροτροχού, και παρατείνετε τη διάρκεια ζωής της μπαταρίας.
8. Περιγραφή μοντέλου προϊόντος

① :ZTWGP represents the appearance style
②:Παράμετροι εξόδου παλμού:
01: Indicates that the pulse output signal is A, B; Παλμική τάση 5V; pulse quantity 100PPR.
02:Indicating thatthe pulse output signals are A and B; Pulse voltage 12V; pulse quantity 100PPR.
03:Indicating thatthe pulse output signals are A, B, A -, B -; Παλμική τάση 5V; pulse quantity 100PPR.
04:Υποδεικνύει μια έξοδο ανοιχτού κυκλώματος NPN χαμηλού επιπέδου, με σήματα εξόδου παλμού των Α και Β;The number of pulses is 100PPR.
05:Υποδεικνύει έξοδο πηγής PNP υψηλού επιπέδου, με σήματα εξόδου παλμού των Α και Β; The number of pulses is 100PPR.
③:Representing the number of axis selection switches, 2 αντιπροσωπεύει 2 τσεκούρια.
④:Represents the type of axis selection switch signal, Το A αντιπροσωπεύει σήμα εξόδου από σημείο σε σημείο, και το Β αντιπροσωπεύει το κωδικοποιημένο σήμα εξόδου.
⑤:Represents the type of multiplication switch signal, Το A αντιπροσωπεύει σήμα εξόδου από σημείο σε σημείο, και το Β αντιπροσωπεύει το κωδικοποιημένο σήμα εξόδου.
⑥:Represents the number of custom buttons, 2 αντιπροσωπεύει 2 προσαρμοσμένα κουμπιά.
⑦:Represents the power supply for the system handwheel, και 05 αντιπροσωπεύει τροφοδοτικό 5V.
⑧:L represents the left column (left knife holder), and R represents the right column (right knife holder).
9.Solution to Product Malfunctions

1. Χρησιμοποιήστε το σε ξηρό περιβάλλον σε θερμοκρασία δωματίου και πίεση για να επεκτείνετε τη διάρκεια ζωής του.
2. Αποφύγετε τη χρήση σε μη φυσιολογικά περιβάλλοντα όπως φυσαλίδες βροχής και νερού για να επεκτείνετε τη διάρκεια ζωής.
3. Διατηρήστε την εμφάνιση του χειροτροχού καθαρή για να παρατείνετε τη διάρκεια ζωής του.
4. Παρακαλώ αποφύγετε το σφίξιμο, πέφτοντας, πρόσκρουση, και τα λοιπά. για την αποφυγή ζημιών στα εξαρτήματα ακριβείας στο εσωτερικό του χειροτροχού ή σφαλμάτων ακρίβειας.
5. Εάν δεν χρησιμοποιείται για μεγάλο χρονικό διάστημα, παρακαλούμε αποθηκεύστε τον χειροτροχό σε καθαρό και ασφαλές μέρος. Κατά τη διάρκεια της αποθήκευσης και της μεταφοράς, Πρέπει να δοθεί προσοχή στην υγρασία και την αντίσταση σε σοκ.
11. Πληροφορίες για την ασφάλεια
1. Διαβάστε προσεκτικά τις οδηγίες πριν από τη χρήση και απαγορεύστε στους μη επαγγελματίες να λειτουργούν.
2. Please replace the battery in a timely manner when the battery level is too low to avoid errors caused by insufficient battery power and inability to operate the handwheel.
3. Εάν απαιτείται επισκευή, Επικοινωνήστε με τον κατασκευαστή. Εάν η ζημιά προκαλείται από αυτο -επισκευή, ο κατασκευαστής δεν θα παρέχει εγγύηση