説明
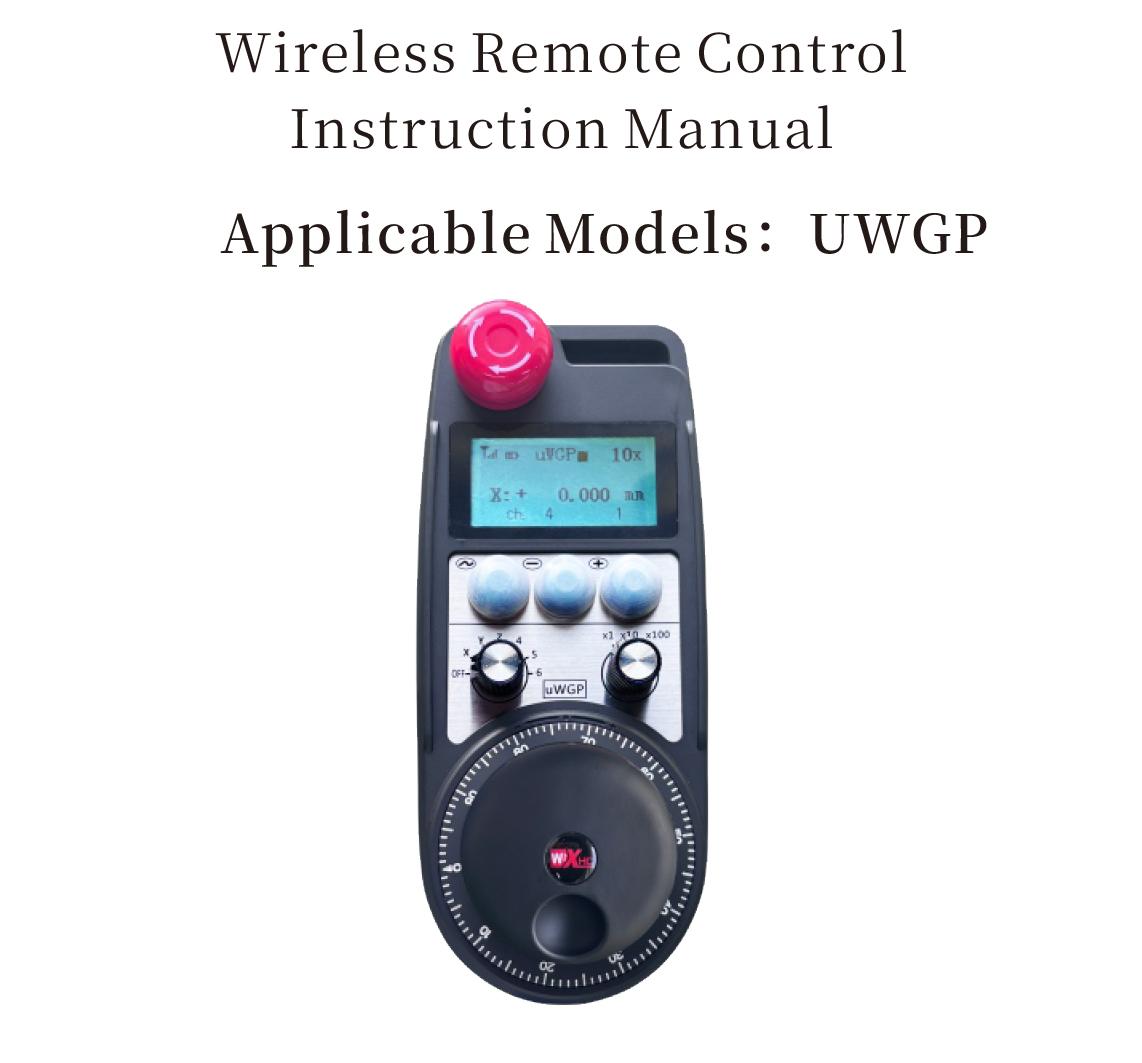
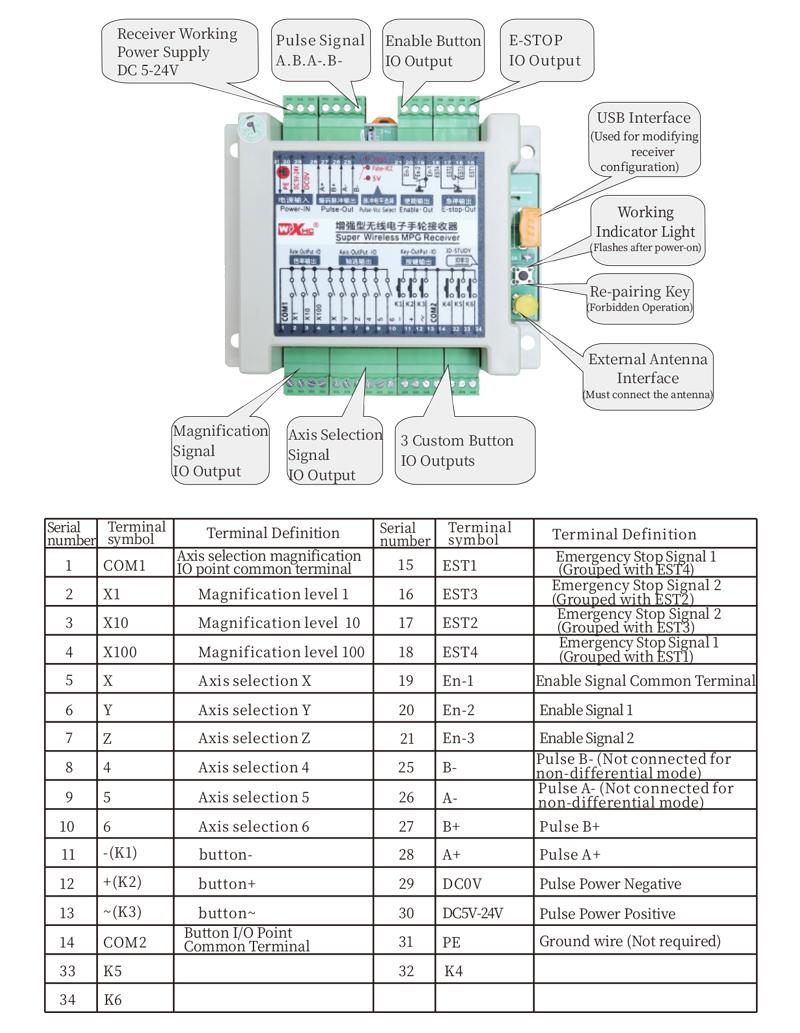
1.製品の紹介
Wireless Remote Control is used for manual guidance, 位置決め, tool setting and other operations of CNC machine tools. この製品は無線伝送技術を採用しています, 従来のスプリングワイヤー接続を排除, ケーブルに起因する機器の故障を減らす, ケーブルの引きずりによるデメリットを解消, 油汚れ, 等, and is more convenient to operate.It is widely applicable to CNC machine tools such as gantry machining centers, gantry vertical lathes, and CNC gear processing machines, and is compatible with various mainstream CNC system brands on the market, including Siemens, 三菱, ファナック, Syntec and more.
2.製品機能
1. 433MHz無線通信技術を採用し、無線動作距離は500mA 20 メーター.
2.適応型周波数ホッピング; 32 ワイヤレスリモコンのセットは干渉することなく同時に使用できます.
3.Supports the emergency stop button, and the emergency stop button remains effective even after the remote control is powered off.
4.サポート 3 IO信号出力切り替え付きカスタムボタン.
5.6軸制御をサポート, そして 7 12軸制御までカスタマイズ可能.
6. 3段階の倍率制御に対応, 4 段階の倍率制御がカスタマイズ可能.
7.イネーブルボタン機能をサポートします, スイッチングIO信号を出力可能, 制御軸の選択も可能, 倍率とエンコーダー.
8.ソフトウェアによる軸選択と倍率のエンコードタイプの変更をサポート.
9. Supports pulse encoder with specification of 100 1回転あたりのパルス数.
10. Supports standard Type-C charging with 5V-2A charging specification; built-in battery
specification: 14500 / 1100mAh.
| Working Voltage and Current of Handheld Terminal |
3.7V/20.0mA |
| Charging Battery Specification |
3.7V/14500/1100mAh
|
| Low Voltage Alarm Range of Handheld Terminal |
<3.35v |
| Receiver Power Supply Voltage |
DC5V-24V/1A |
| Receiver Emergency Stop Output Load Range |
AC125V-1A/DC30V-2A |
| Receiver Enable Output Load Range |
AC125V-1A/DC30V-2A |
| Receiver Custom Button Output Load Range |
DC24V/50mA
|
| Receiver Axis Selection Output Load Range |
DC24V/50mA |
| Receiver magnification Output Load Range |
DC24V/50mA |
| Handheld Terminal Transmit Power |
15dBm
|
| 受信機の受信感度 |
-100dBm |
| 無線通信周波数 |
433MHz周波数帯域
|
| Wireless Communication Distance |
20 meters barrier-free distance
|
| Operating Temperature |
-25℃<×<55℃ |
| Safe drop height |
1 m
|
| Number of Custom Buttons |
3
|
| Product Weight |
546.86(g) |
| Product Dimensions |
200*87*72(mm) |
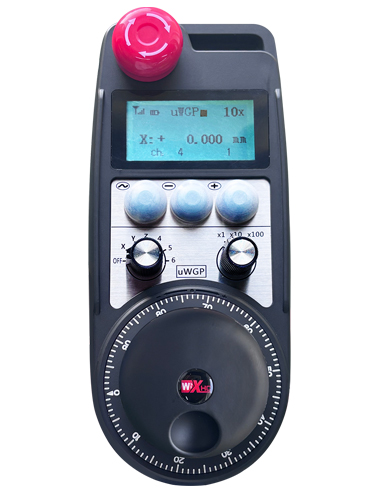
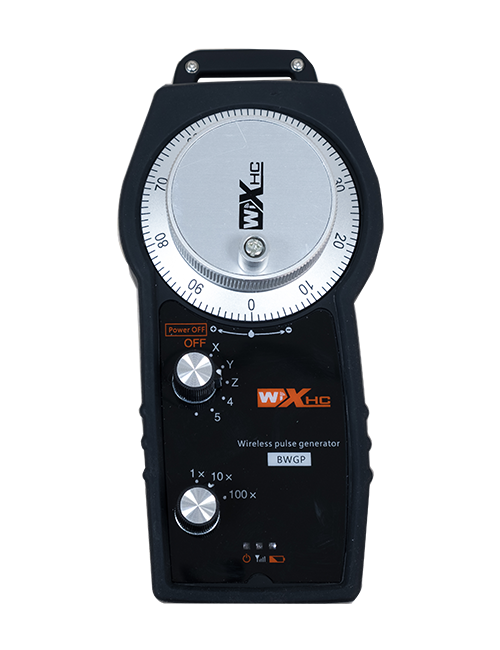
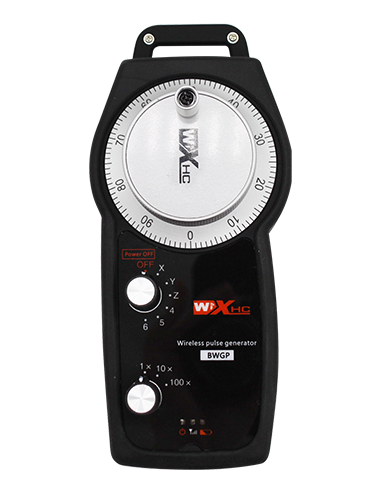
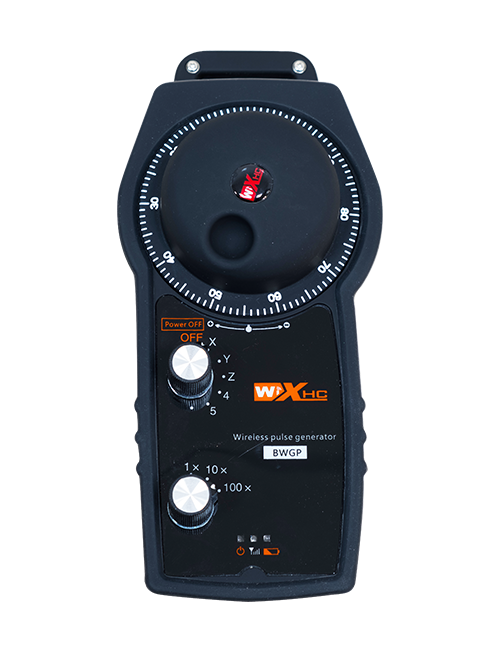
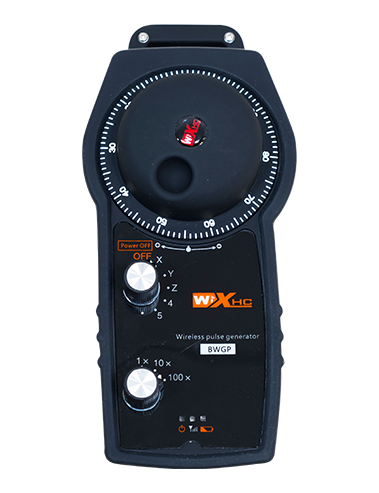
4. 製品機能紹介
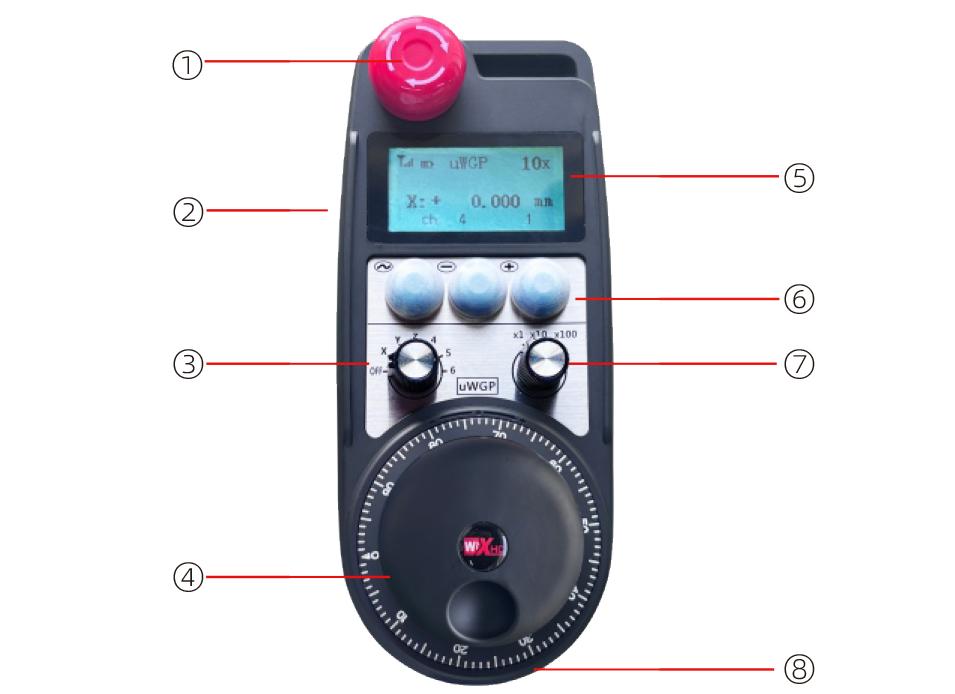
メモ:
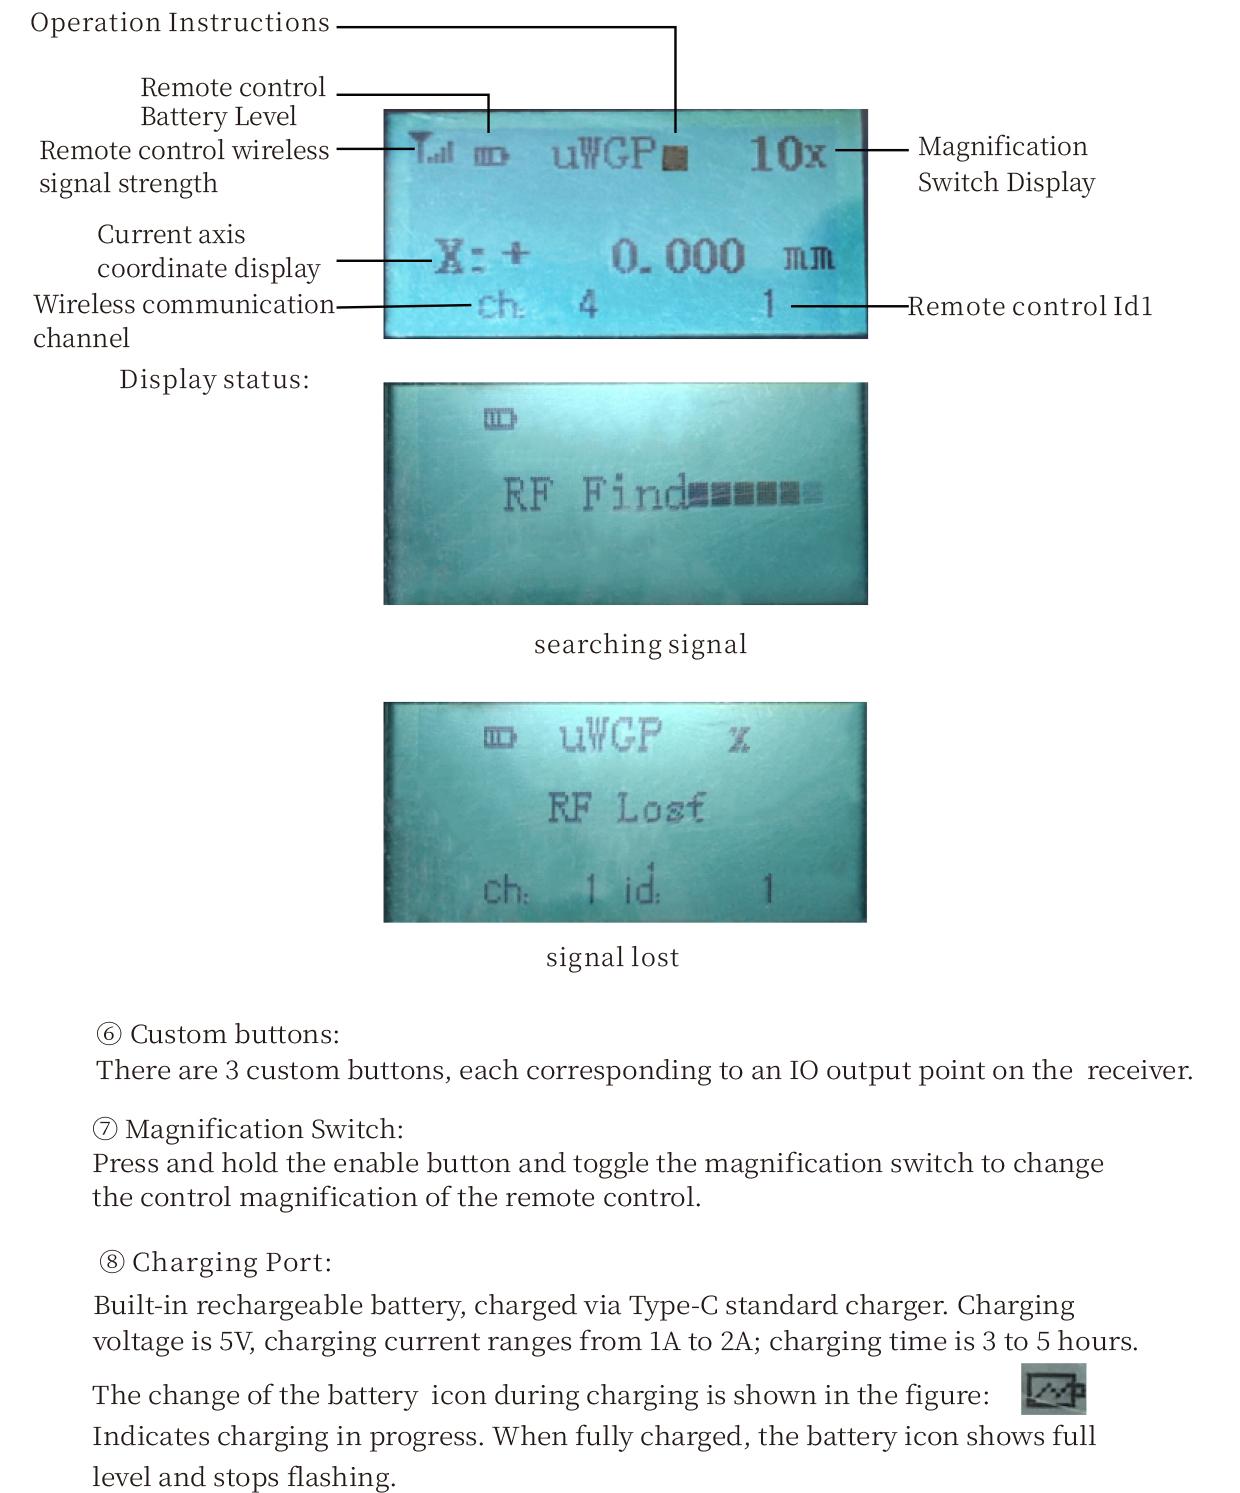
① Emergency Stop Button:
非常停止ボタンを押す, the two groups of emergency stop IO outputs on the receiver will disconnect, and all remote control functions will be invalidated.Release the emergency stop button, the emergency stop IO outputs on the receiver will be closed, and all remote control functions will be restored. 加えて, even if the remote control is powered off, pressing the emergency stop button can still activate the emergency stop IO output of the receiver.
② Enable Button:
Press either enable button on both sides, the two sets of enable IO outputs on the receiver will conduct. Release the enable button, and the enable IO outputs will disconnect. It is necessary to press and hold the enable button before toggling axis selection, magnification or rotating the remote control for the operation to take effect.This function can be canceled through the configuration software.
③ Axis Selection Switch (Power Switch):
有効化ボタンを押し続けます, then toggling the axis selection switch can control the movement of axis .Press and hold the enable button, then toggle the axis selection switch to switch the motion axis controlled by the remote control. Toggle the switch from the OFF position to any axis position, and the remote control will power on automatically.
④ Pulse Encoder:
Press and hold the enable button and rotate the pulse encoder, it will output pulse signals to control the movement of the machine axis.
⑤ LCD Display Screen:
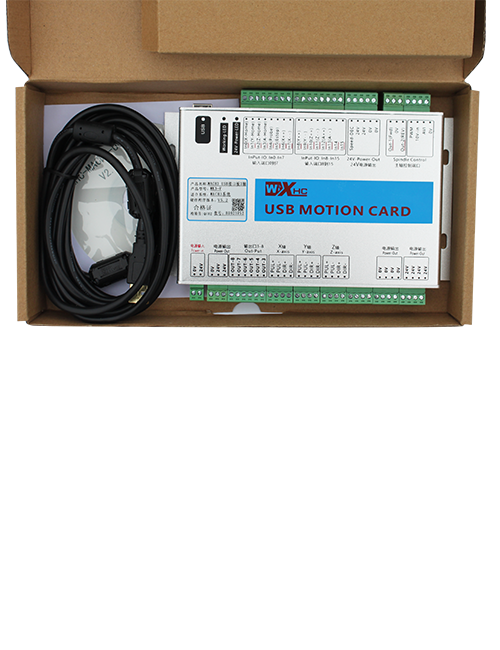
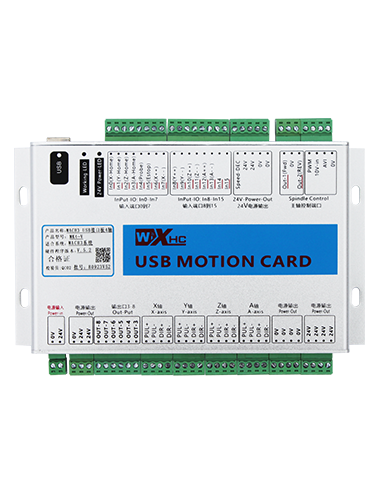
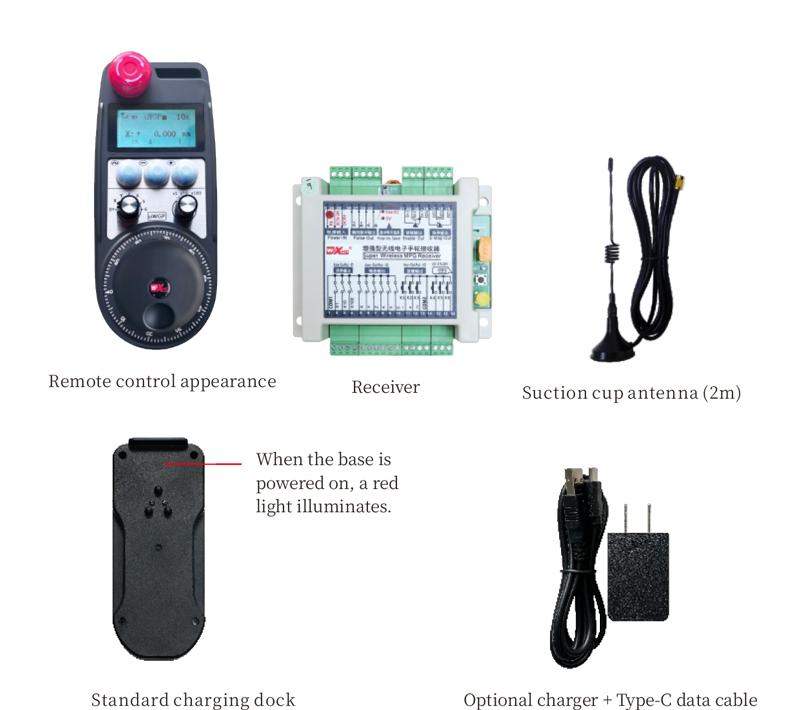
5. Product Accessories Diagram
6. 製品インストールガイド
6.1 製品のインストール手順
1. Install the receiver in the electrical cabinet via the buckle on its back, or mount it inside the electrical cabinet through the screw holes at the four corners of the receiver.
2. レシーバー配線図を参照してください, 現場の設備と比較してください, and connect the equipment to the receiver with cables.
3. After the receiver is fixed in place, install the supporting antenna of the receiver properly. Mount or place the outer end of the antenna outside the electrical cabinet. It is recommended to place it on the top of the electrical cabinet for optimal signal performance. Do not leave the antenna uninstalled or place it inside the electrical cabinet; さもないと, signal failure may occur.
4. ついに, turn on the remote control power switch, then you can remotely operate the machine via the remote control.
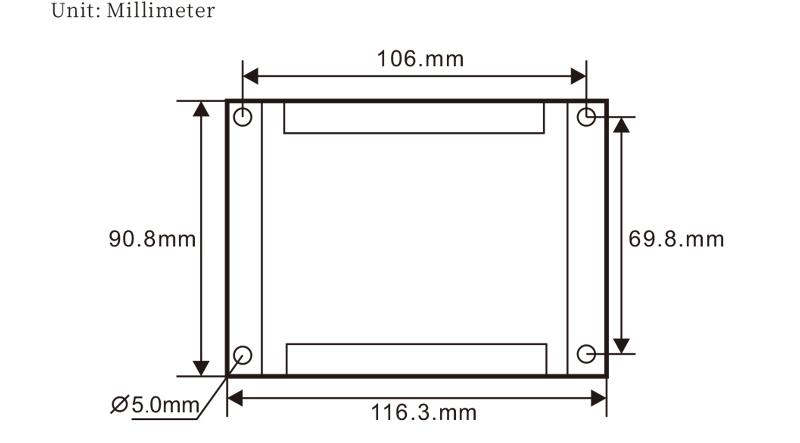
6.2 Receiver Installation Dimensions
7. 製品の操作説明書
1. 本機と受信機の電源を入れます. The receiver operation indicator flashes. After the wireless electronic remote control is fully charged, toggle it from the OFF gear to the X-axis gear, and the remote control display lights up.
2. Select the axis : 有効化ボタンを押し続けます, toggle the axis selection switch to select the axis to be operated.
3. Select the magnification: 有効化ボタンを押し続けます, toggle the magnification switch to select the required magnification gear.
4. Axis movement: 有効化ボタンを押し続けます, select the axis selection switch and the magnification switch, then rotate the pulse encoder. Rotate clockwise to move the axis in the positive direction, and rotate counterclockwise to move the axis in the negative direction.
5. 任意のカスタムボタンを押し続けます, the corresponding button IO output of the receiver will turn on; release the button, and the output will turn off.
6. 非常停止ボタンを押す, the corresponding emergency stop IO output of the receiver disconnects and the remote control function becomes invalid. Release the emergency stop button, the emergency stop IO output closes and the remote control function is restored.
7. If the wireless remote control is not operated for a period of time, 自動的にスリープモードに入り、消費電力を削減します。. It can be used normally again by pressing the enable button again.
8.If the wireless remote control is not used for a long time, turn the axis switch to OFF to turn off the power and extend battery life
①:UWGP stands for appearance style.
②:Pulse Output Parameters:
01: パルス出力信号がAであることを示します。, B; パルス電圧5V; パルス量100PPR.
02: パルス出力信号がAであることを示します。, B; パルス電圧12V; pulse quantity 25PPR.
03: パルス出力信号がAであることを示します。, B, あ -, B -; パルス電圧5V; パルス量100PPR.
04: ローレベルのNPNオープン回路出力を示します, A、Bのパルス出力信号付き; The number of pulses is 100PPR.
05: ハイレベルPNPソース出力を示します, A、Bのパルス出力信号付き; パルス数は100PPRです.
③:Represents the axis selection switch quantity; 6 stands for 6 軸, 7 stands for 7 軸, and so on.
④: Represents the signal type of the axis selection switch.A stands for point-to-point output signal, and B stands for encoder output signal.
⑤: Represents the signal type of the magnification switch.A stands for point-to-point output signal, and B stands for encoder output signal.
⑥: カスタムボタンの数を表します; 3 corresponds to 6 カスタムボタン.
⑦: Represents the power supply for the system remote control. 05 stands for 5V power supply, そして 24 stands for 24V power supply.
⑧: Represents the contact charging mode. It starts charging automatically when placed back on the charging base.
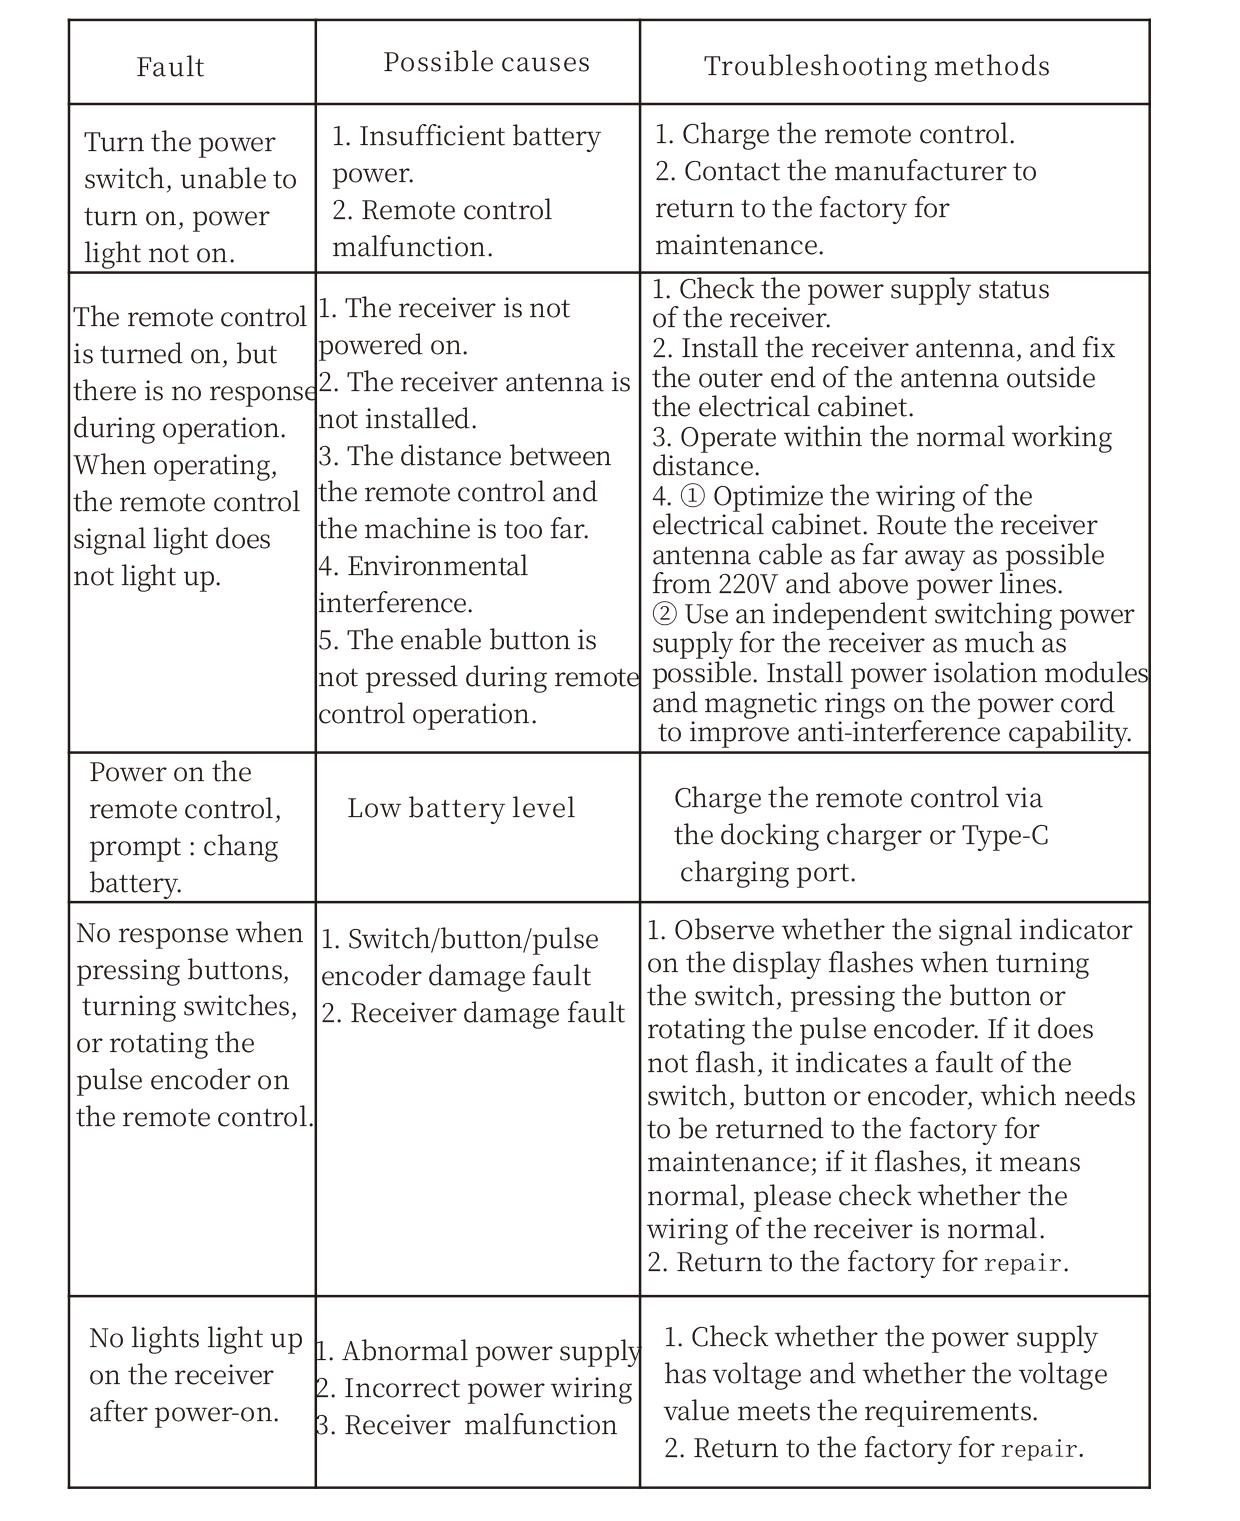
9. 製品のトラブルシューティング
10. Maintenance and upkeep
1. 室温と圧力の乾燥環境でそれを使用して、そのサービス寿命を延ばしてください.
2. Please avoid using in abnormal environments such as rain and water to extend the service life.
3. Please keep the appearance of the remote control clean to extend its service life.
4. Please avoid crushing, dropping, or bumping, 等. to prevent damage to the precision components inside the remote control or accuracy errors.
5. 長い間使用されていない場合, please store the remote control in a clean and safe place.
6. Avoid moisture and shock during storage and transportation.
11. 安全情報
1. 使用する前に指示を注意深く読んで、非専門家が運営を禁止してください.
2. Please charge the remote control in a timely manner when the battery level is too low, to avoid malfunction and operational errors caused by insufficient power.
3. If you repair it yourself and cause damage, the warranty will be void.